Photoboof Manual
If you need any help with any of this, feel free to email support@photoboof.com. We want to get you up and boofing, and we'll even talk you through it on the phone if need be or take control of your computer (with your help of course) to get it set up.
Quick Start
Computer Setup
Printer Setup
Camera Setup
Hardware Recommendations
Layout Editor
Photo Effects (sepia, sketchbook, etc.)
Greenscreen Pictures
Foreground Images
Recording Videos
Building Animated Gifs
Building Video Slideshows
Allowing Users to Retake Pictures
Vertical Camera Orientation
Live Preview Notes
Viewer Configurations
Dual Monitor Support
Slideshow
Skinning Photoboof
FTP Uploading
Uploading to Facebook
Sharing Using an iPad
Adding Sound To Your Booth
Triggering Photoboof
Touchscreens and Photoboof
Monitored Folder
Manual Shooting
Controlling Lights and Relays from Photoboof
Interfacing with Bill Acceptors
Data Entry, Emailing Pictures and MMS
Running External Commands
Advanced Configurations
Importing Configurations
Rebranding for OEMs
Adding Watermarks to Your Pictures
Odds & Ends
Troubleshooting
There's lots of details in this manual, but here's a quick start:
1) Follow the steps in Computer Setup below.
2) Follow the steps in Printer Setup below.
3) Run Photoboof.
4) Go to File --> Preferences --> Camera and set your camera controller and restart Phtooboof. If you're using a Canon Powershot, your camera controller is "Photoboof With a Powershot", a Canon DSLR is "Photoboof with a DSLR", a webcam is "Photoboof with a webcam", and a Nikon DSLR is "Nikon DSLR".
5) If you get any errors, you might need to read the rest of this manual to get started. Or feel free to email support@photoboof.com, attaching your log file (c:\photoboof7\log.txt) if possible. We'd be glad to log into your computer remotely if we need to.
6) If you're only using a single monitor, note that the F1 key will close the Viewer (what people inside the booth see), which will otherwise take over your screen. This is meant to be seen inside the booth and can be on any monitor, and it's highly recommended to show this on a secondary monitor so you can see the main program messages, printer messages, etc. on the primary monitor. But using just one monitor works well too, just remember the F1 hotkey.
7) By default F12 starts a photobooth session, so Photoboof will start taking pictures when you press the F12 key. See the section Triggers below for many more trigger options. When you buy a license, we send you an arcade-quality backlit button that plugs into your USB port.
8) Feel free to email any questions, suggestions, requests for help, whatever, to support@photoboof.com.
- Run the installer, which by default will install everything to c:\photoboof7. Unless you have a good reason for doing otherwise, we recommend keeping this setting.
- If you're using Windows 7, Windows 8 or Windows 10 its a good idea to set Photoboof to run as administrator. So right-click the file c:\photoboof7\photoboof7.exe (it has a camera icon) and choose Properties, then Compatibility, then check the box that says "run as administrator".
- For Nikon DSLRs, select "Nikon DSLR" from Preferences -> Camera. Or if you'd prefer you can use Nikon Camera Control Pro 2 as the camera controller. To do that, select "Nikon Camera Control Pro" from Prerferences -> Camera.
- Recommended setup: a Pentium IV or better computer, XP or newer, meaning any version of Windows 7, 8 or 10. Canon Powershots tend to be the easiest to use (pick up a Powershot S5 off ebay, you won't be sorry), or a Canon Rebel (T2i or newer) if you want to use a DSLR. A second monitor to put inside the booth for people to see their pictures on The Viewer makes your life much easier. There are more details in Hardware Recommendations.
Photoboof works with any printer that works with Windows.
To configure your printer:
1) In the main Photoboof window, click File --> Configure Printer.
2) Select your printer from the "primary printer" pulldown list, then choose "configure", which will launch your printer's configuration dialog. Set the paper size, paper type and print quality here.
3) Then back in Photoboof, set the paper orientation and any margins.
If you're having trouble getting the printout to fill the whole page, you might want to set the "Print Size" at the top left of the window to "stretch (no aspect ratio)", which will stretch the print to fill the page. Then for "position" at top right, uncheck "center" and then manually set the margins. The margins are measured in inches, so you can use very small numbers. For example if you want to add a little left margin, start with a number like .05 for the left margin. After making each change, click "apply" and then print a layout again to see how it looks.
To disable printing, uncheck "enable printing" at the bottom of the Configure Printing screen.
Sidenote: Photoboof counts how many prints have been sent to your printer. The count shows in the statusbar, and you can reset the count with the "reset count" button on the main Photoboof program window.
Advanced Tip: Photoboof can optionally use a second printer in a number of very useful ways. Go to the Printer Preferences page and set your Secondary Printer, and then set your Secondary Printer Mode as follows:
Duplicate: in this mode both the primary and secondary printers will print the same strip. In other words you'll get two copies of each strip, one from each printer. Very useful for scrapbook stations. Note that this temporarily doesn't work with network printers.
Round Robin Printing: in this mode Photoboof will print to the primary printer, then the secondary printer, then the primary printer, etc.
Backup Printer: in this mode Photoboof will print to the primary printer until it fails (for example, until it runs out of paper), and then print to the secondary printer. This mode is currently experimental, please let me know if it doesn't work with your printer and we'll add support for it.
Reprint Last Button: in this mode the secondary printer is only used when the "reprint last" button is pressed.
Sidenote: using a Hiti printer, and want to split your 4x6 paper into two 2x6 strips? On Photoboof's Printer Configuration page select "Hiti (method1)" under "Paper Splitting". But note that different Hiti printers use slightly different methods for splitting the paper, so if your print jobs are being ignored please select "Hiti (method 2)" for the paper splitting.
Canon Powershots
Many people love the ease of use and quality of the Canon Powershots for use in a photobooth. Unfortunately Canon has discontinued remote capture in their newer Powershots, meaning they won't work in photobooths. But fear not, Powershots are still all over ebay, including the ever-popular Canon S5, a purchase you won't regret.
To use a Powershot with Photoboof, go to File --> Show Preferences --> Camera and set the controller to "Photoboof with a Powershot". If you want to use a live preview so your customers can orient themselves to the camera frame, make sure the live preview is set to "yes" as well. Then restart Photoboof.
- See the live preview section of the manual for some discussions on optimizing your camera's live preview, including placement and customizing the text that appears before each picture is taken.
- If you find that the timing of your camera is a bit off, try adjust the "delay before picture is taken" on the Camera preferences screen. This is the amount of time before the end of the Viewer countdown that Photoboof tells your camera to take a picture. In other words, if the Viewer countdown is saying "3 - 2 - 1 - 0" and then there's a pause before the camera fires, you need to adjust this value. If your camera is firing before the countdown reaches 0, you need to increase it. The value will vary from camera to camera, but most are in the range of 2.5 seconds, which is the default.
- You can adjust all your camera's settings on Photoboof's camera controller, called Big Picture.
- You can see a full list of supported Canon Powershots on this page.
Canon and Nikon DSLRs
- In Photoboof, go to File --> Show Preferences --> Camera and set the controller to "Photoboof with a Canon DSLR " for Canon DSLRs, or "Photoboof with a Nikon DSLR" for Nikon DSLRs. If you want to use a live preview so your customers can orient themselves to the camera frame, make sure the Live Preview is set to "yes" as well. Then restart Photoboof.
- See the live preview section of the manual for some discussions on optimizing your camera's live preview, including placement and customizing the background image. Note that you need to move the settings dial on your camera off of "automatic" mode before you can use the live preview on your camera.
- If you find that the timing of your camera is a bit off, try adjust the "delay before picture is taken" on the Camera preferences screen. This is the amount of time before the end of the Viewer countdown that Photoboof tells your camera to take a picture. In other words, if the Viewer countdown is saying "3 - 2 - 1 - 0" and then there's a pause before the camera fires, you need to adjust this value. If your camera is firing before the countdown reaches 0, you need to increase it. The value will vary from camera to camera, but most are in the range of 2.5 seconds, which is the default.
- You can adjust all your camera's setting on Photoboof's camera controller, called Big Picture. Note that with DSLR's you adjust the exposure mode on the camera itself.
- You can see a list of supported Canon and Nikon DSLRs on this page.
- If you're using an external flash and it won't fire when you're using the Live View, go to Big Picture (the camera controller) and make sure to check Camera --> Live View Options --> Auto Focus Live View.
- If you're having frequent auto focus failures with a Canon DSLR, adding more light can often help, and sometimes changing the AF Mode inside Big Picture helps too. The AF Mode setting is towards the bottom of Big Picture. A good setting is "AI Servo AF", or whichever mode has the word "Servo" in it for your camera. Note that when Photoboof can't focus the camera, it shows the image "focus_error.jpg" from the skins folder.
- if the Live Preview is dark with a Canon DSLR, you can try setting a separate TV (shutter size) value for your Live Preview. In Big Picture, look at the bottom right for "Live Preview TV". Set this to "same as pictures" to use the same value as pictures, or any other value to use a separate value. Note that while you're tuning this you can launch a second, permanently visible Live Preview by clicking Action --> Duplicate Live Preview from inside Photoboof.
Webcams have some advantages over stills cameras: they're rock solid since there's no power supplies or power buttons, and compared to a digital stills camera they're extremely simply to operate. And if you use Photoboof's ability to trigger a relay you can even rig up a flash. Or you might want to experiment with Photoboof's experimental "screen flash", which will turn the whole screen white (or any color) before taking a picture. In Moving Images, have a look under the camera menu at "Screen Flash".
If you're looking for a webcam recommendation, the Logitec Orbit or any of the later Logitech webcams are excellent and works very well with Photoboof.
That said, their quality is still significantly lower than a Canon Powershot or DSLR. If you're looking for an inexpensive Canon Powershot, you might have a look on ebay for a Powershot S5. But with the right lighting a webcam can produce excellent results.
To use a webcam, set Photoboof's Camera Controller to "Photoboof with a webcam". You do this by clicking File --> Preferences --> Camera --> Camera Controller. When you launch Photoboof you'll now see Photoboof's webcam controller, which is called Moving Images.Now go ahead and start a photobooth session, which you can do either by clicking the "Boof" button in the main Photoboof window, or by clicking the F12 key. You may have to adjust the timing slightly. If the moment your webcam is taking the picture doesn't coincide with when Photoboof's "say cheese" graphic appears, you can go to Preferences --> Camera and adjust the value for "Delay Before Picture Is Taken". By default its set to 2.5, but for most webcams you might want to change that to 2.8 seconds or 3 seconds.
TROUBLESHOOTING:
- If you get low frame-rate, set the "Snapshots Size" to something small like 640x480 to start, and go to Camera --> Camera Options and set the Video Size to the same setting, and set the "frames per second" to 30. Now note the frames per second shown in the statusbar of Moving Images.
Note that some webcams slow down their framerate in low light situations. For example, the Logitech webcams have a setting called "Right Light" which lower the framerate in low light. If this is a problem for you, you can disable this setting in the webcam's configuration. Note that it can be useful though for getting better pictures in low light. But often with photobooths you want to disable the automatic brightness, contrast, focus and light adjustment.
- if you have problems initializing your camera, try disconnecting any other webcams, cameras, scanners, etc. from your computer.- verify that your webcam is working in other applications. Try AmCap.exe, which you can download here, or Webcam2000
- make sure no other application is using the webcam when Photoboof is trying to.
- if the webcam is taking a picture at the wrong time in the 3-2-1-0 countdown, go to Preferences --> Camera in Photoboof, and change the "Dealy Before Picture Is Taken" value. A value of 2.8 seconds seems to work well for most webcams.
- if you're using an HD webcam and getting incorrect aspect ratios, email me.
Nikon DSLRs using Canon Control Pro
You can optionally use Nikon's Camera Control Pro as a camera controller for your Nikon DSLR. To do that, from Photoboof go to Preferences (File -> Preferences), then click the Camera folder tab, and for the "camera controller" choose "Nikon Camera Control Pro".
- Install Nikon Camera Control Pro 2, which probably came with your camera. If it didn't, you can download it here.
- To make your camera remote controllable by the computer, go to Menu on your camera, then select USB, then select "PTP" instead of "Mass Storage".
- Tell Camera Control Pro 2 to save the pictures to c:\photoboof7\capture by going to Tools --> Download Options.
- In Photoboof go to Preferences --> Camera and set the camera controller to "Nikon DSLR", then restart Photoboof.
- If you get permission errors, add a prefix to the filename in Nikon Camera Control Pro. For example, you could make the prefix be "photoboof".
- Make sure to provide enough light for your camera's auto focus. If Photoboof can't focus your camera, it will display the image "focus_error.jpg" from your skins directory, which by default is c:\photoboof7\assets\default.
Important Note: its never a good idea to put your camera through a USB hub. And if you're experiencing connection problems, try blowing the dust out of the USB jack of the camera, your computer, and the cable itself.
Computer
Photoboof loves laptops since they're cheap, easily portable, and most important usually have a VGA, DVI or HDMI output for a second monitor. Any modern version of Winodws will work (XP or newer), but you should avoid Vista 64-bit because some of your hardware may not work with it.
When you buy a license you get a free super high quality arcade-style backlit button that plugs into your USB port (or serial port if you prefer).
As mentioned above, a dedicated second monitor for people inside the booth is highly recommended.
If you're going to be using Photoboof's slideshow feature, you might consider using a desktop computer, which will give you the option of having 3 monitors (one for Windows, one for the Viewer, one for the Slideshow). But if you're using a laptop, you can connect a third monitor using a USB videocard such as this one.
As far as system specs, everything should work well on any semi modern computer, meaning a P4 or better. If you're using a slow computer such as a netbook with a Canon or Nikon camera, you might decrease the image size in Big Picture so assembling the strips takes less CPU resources. And as always the more RAM the better.
Camera
Any of the supported Powershots and any of the supported Canon or Nikon DSLRs work well. The cadillac route for Powershots is the Canon Powershot S5, G9 or G10 series since they have flash hotshoes. Those are nice since they let you connect external flashes. And the fact that they have great light sensitivity/color quality, are very fast, and stable doesn't hurt.
If you go the Canon DSLR route, make sure to get one that supports live preview so people inside the booth can see themselves before the pictures are taken. The best for this is the Canon Rebel T2i or newer.
And the Logitech webcams, such as the C920, can give excellent results.
Printer
The big consideration with a printer is how much attention you want to spend on it. If you'll be attending the booth, meaning will be nearby and don't mind loading in new paper every 40 or so prints and dealing with an occasional printer jam, an ink jet works great. They have an additional huge advantage: they can print to 2.13" x 6" strips. Actually not all inkjets can print that narrow, but the Canons can. I love the Canon IP2600, which can be had for all of $50 on ebay. Its an incredibly good printer, but they make their profit on the inks.
If you need unattended use, you want a dye sublimation printer. The usual favorite is the DNP RX1 or DS40 (available at fotoclubinc.com), which can load 600 sheets and will almost never jam.
Photoboof has two layout editors, the classic and the new layout editor. I'd recommend using the new layout editor as it's easier to use. You can open it by clicking File -> Layout Editor. Note that you can still use Photoboof's old layout editor by clicking File -> Layout Editor (Classic) if you'd prefer, but we'd recommend moving to the new version since its so much easier to use without sacrificing any of the power. If your layout begins with "v1", it uses the old layout editor.
Converting your old layouts to the new version should be easy enough since layouts are now so easy to build, but feel free to email over your layout file (its a text file in c:\photoboof7\layouts) and we'd be glad to convert it for you.
And note that Photoboof will rename your old classic layouts, adding a "v1" to the start of their names. For example if your old layout was named "double strip wedding", Photoboof will change it to "v1- double strip wedding". It won't change the layout in any way though, and you can continue using the classic layout editor if you'd like. And to make transitioning simpler we've included most of Photoboof's old layouts rebuilt using the new format.
Creating A Layout From Scratch
Its usually easiest to see if there's a layout that matches or is close to what you'd like to use, which you can do by clicking File -> Open, but creating a layout from scratch covers a lot of the basics of using the Layout Editor so here's a step by step.
1) In the Layout Editor, click File -> New and enter whatever name you'd like to use for your layout. This will create a generic 4 picture layout.
2) Now at top left, set how many pictures you'd like to use in your layout. For example, if you'd like to have 6 pictures, change the "Number of Pictures" to 6. Note that this is the number of pictures that will be taken in the photobooth session. If you're making a double strip layout, where for example you're only taking 4 pictures but have the pictures appear twice on your printout, set this to "4" (or however many) and check "Add second set of pics".
3) Below the number of pictures, set your camera orientation, which is either horizontal or vertical. If your camera is turned on its side, that's "vertical", otherwise set it to "horizontal".
4) Then set your camera type. This is pretty straight forward: if you're using a DSLR set it to "DSLR", for webcam choose "Webcam" and for a Canon Powershot choose "Powershot". Note that this sets the aspect ratio of the pictures, since different cameras take pictures with different aspect ratios.
5) Now set your paper size. Note that this is where you set both the size of the paper (for example 4x6 inches) and the orientation of your printout (vertical or horizontal). When you change this option the canvas of the layout editor will update accordingly.
Now you have the basics of your layout and can begin positioning the photos, adding graphics and text, etc.
Positioning and Resizing Pictures
To move the pictures around your canvas, simply click and drag them to where you'd like. To resize a picture, click one of its corners and drag it until its the size you'd like. Since in most photobooth layouts all the pictures are the same size, you can set the size of any one picture and then click the "Resize Other Pics" button at top right.
And as with all assets in your layout, you can nudge the picture position using the arrow keys on your keyboard. For example, to move the picture up 1 pixel, select it and press the up arrow key. To move it up 10 pixels, select it and hold the control key and press the up arrow key. And a really nice tool for making sure your pictures are perfectly aligned is the text fields at the top. For example, if you're putting 4 pictures in a column, you can read look at the X (horizontal) position of one of the pictures and then click each other picture in the column and set its X position too. But note that that's strictly optional and you can do all the positioning with the mouse and/or keyboard arrow keys if you'd prefer.
Changing The Background Color
To change the background color of your layout, simply click the color button next to "Background Color".
Adding Background Images
To add a background image click the button next to "Background Image" on the left and browse to whatever image you'd like to use. As with all graphical assets used in Photoboof layouts, its a good idea to put them in the c:\photoboof7\layouts folder, since Photoboof looks there first for assets, but that's not strictly necessary.
After adding a background graphic you can resize it if needed using the resize button at the bottom right of the canvas.
Adding Background Image Masks
Image masks are similar to background images, except that they're placed over the layout, instead of behind it. Image masks are a bit more advanced and harder to produce than background images, and can be safely ignored if you're not familiar with them, but if you'd like to add an image mask, you can easily do so by clicking browse next to "Image Mask". The most common way to produce image masks in Photoshop is to click File -> Save For Web and then for format choose "PNG-24" and check the "transparency" button.
Inserting Text
To insert text, click the button next to "Insert Text" and type whatever you'd like. Then set the font, font size, color, line spacing and alignment (if you're entering multiple lines of text), and a stroke (outline) if any.
Note that if you're inserting multiple lines of text you may need to change the "line spacing" field to a negative number to get the spacing just right.
Also note that Photoboof will use all the fonts in your Windows fonts directory (usually c:\windows\fonts) but also any fonts in the /fonts subfolder of Photoboof's layouts directory (usually c:\photoboof7\layouts\fonts). That makes installing new fonts very easy, as well as transferring your fonts to your other photobooths, since they're copied over with the layout directory.
And to edit text after entering it, simply click the block of text and edit to taste.
Inserting Graphics
If you'd like to insert a graphic or bit of clip art or whatever, click the button next to "Insert Graphic". You can then browse to whatever image you'd like to insert. After its placed on the layout you can resize it to taste, and position it wherever you'd like. Note that if you hold the control key while resizing it, it will maintain its aspect ratio.
To delete a graphic, select it and then click the trash icon at the top of the screen.
Adding Rounded Edges or Stroke to Your Pictures
If you'd like to add rounded edges to your pictures, click the Picture Decoration button. You can add rounded edges, set a colored outline to the pictures, add "sloppy edges" for an old timey photo effect, etc.
Making Square Picture Layouts (for Instagram, etc.)
To make square picture layouts, choose "Square Pictures" for the "camera type" on the layout editor. Now the camera's live preview, the review after each picture is taken, and the layout's pictures will all be square.
Previewing And Printing Your Layout
If you want to have a closer look at your layout, click the Preview button and Photoboof will build your layout in actual size. Once on the preview screen you can print it by clicking the Print button, or open it in your default image viewer by clicking the Open button, or save it by clicking the Save button.
Importing and Exporting Layouts
Its super easy to share your layouts: just click File -> Export Layout, and Photoboof will pack up all the elements of the layout -- every logo, background graphic, image mask, even any fonts used -- into a zip file and place it on your desktop. From there you can share it however you'd like, whether via email or posting on your webpage. If you're particuarly proud of your layout please email it to us and we'll include it in future releases of Photoboof, giving you credit if you'd like.
To import a layout, click File -> Import Layout and browse to the zip file.
Note that you can also manually copy the layout to Photoboof's layout directory (by default that's c:\photoboof7\layouts) and restart Photoboof and it'll see it.
A Note About DNP Printers
DNP printers, such as the popular RX1 and DS40, use a slightly different paper size than most printers, so if you're using a DNP printer click the pulldown next to "Paper Size" at the top left and choose one of the paper size with DNP in the title. For example if you're using a DNP printer with 4x6 paper and your layout is horizontal, for paper size you'd select "4x6 DNP RX1/DS40 - Horizontal", which is near the bottom of the paper sizes.
Configuring Your Printer
When you're ready to print your layout, click the Preview button at the bottom left and then click the "configure" icon at the top right of the preview window, which will open Photoboof's print configuration window. You can then print the layout from the Layout Editor using the icon near top right, and make any adjustments you need.
Odds and Ends
- you can nudge any picture, graphic or block of text with the keyboard arrows. That can give you a bit more control than the mouse for fine tuning the positions of graphics and text. Each time you click the arrow key the object will move one pixel, and holding control while you click the arrow key will move it 10 pixels.
- if you're resizing a block of text or graphic, hold the control key and it will maintain its aspect ratio.
- if you want to duplicate an object in your layout (for example, if you're making a double strip layout and want the logo or text at the bottom of each strip to be duplicated on the right side), click the "duplicate" icon near the top right of the editor, which will create an exact copy of the logo, so you can place it wherever you want.
- if you're editing a layout and you make a mistake, click File -> Revert to load the last saved version.
- if you'd like to add a note about the layout, click the "Show Advanced Settings" button and use the "Layout Notes" text area. That isn't used in the layout, but can be useful for recording printer settings that worked particularly well with that layout, etc.
- to delete a layout, open it and then click File -> Delete. Note that it won't delete any logos or graphical assets, just the layout file itself.
Advanced Tip: Using Different Printers and Paper Sizes
Sometimes you might want to use a different printer and/or paper size for a given layout, separately from your general printing configurations. For example, you might have a touchscreen that gives people the option of using a layout that prints directly to a scrap station printer, or uses larger paper. To do so, click the "Show Advanced" button on the layout editor (its near the bottom left) and paste these parameters into the Extra Parameters area:
printer = Mitusishi 9880
If your printer has any number signs, you need to put a "\" character before the numbers, like this:
printer = Mitusishi 9880 \#2
- if you want your layout to use a specific paper size, copy the exact wording of the paper, case sensitive, and paste it in like this:
paper = 2x6
Advanced Tip: specifying greenscreen and/or foreground images for a specific layouts
Some layouts depend on a given foreground or background image when the picture is taken, so you can set that using the Extra Parameters. So click the "Show Advanced Settings" button at the bottom left and in Extra Parameters add these fields:
greenscreen_background = c:\photoboof\backgrounds\whatever.jpg
- if you want your layout to use a specific foreground image, paste this into Extra Parameters. This lets you let users choose their own foreground images by assigning a different version of the layout to each region of the touchscreen, and setting a different foreground image for each of those layouts.
foreground_image = c:\photoboof\backgrounds\whatever.png
Note that this is different than the layouts background image or mask image.
Photoboof currently has the following photo effects: black & white, sepia, negative, sketchbook and oil painting. If you want to set these effects for all sessions, go to Preferences --> Camera and set the "color mode" value. If you want a different effect for different ways of starting the photobooth session (for example, maybe you want one button to start the photobooth session in color, another to start in black & white, and another to start it in sepia), go to Preferences --> Triggers. If you want different areas of the touchscreen to start the session with different color modes, go to Preferences --> Touchscreen.
If you're using Photoboof as the camera controller, the sepia, black & white and negative effects will appear in the live preview from the camera. In other words, the customer will be able to see the effect before a picture is taken.
Note that the oil painting and sketchbook effect are very processor intensive, so Photoboof shrinks the pictures to 1600 pixels on their longest edge before processing. That's an experimental value, please let us know if that's too small for you.
Advanced Tip: if you want to vary the amount of the photo effect (for example, vary the amount of the sketch effect), open up your raw configuration file, which by default is c:\photoboof7\configuration.ini. You can also select File --> Show Raw Config File from within Photoboof to open this file. Then look for the following lines:
sketch_parameter = 10
painting_parameter = 10
If you upgraded from a recent version of Photoboof, the lines may not be there and you can simply add them. Now you can adjust the amount of each effect by varying the number in the line. For example to increase the amount of sketch effect, you might change that line to read "sketch_parameter = 20".
Photoboof has extremely powerful and flexible greenscreen photography support that works with any webcam, any supported Canon Powershot, and any supported Canon DSLR. The user sees themselves interacting with the background during the live preview, and the printed results are spectacular. Some features in no particular order:
- you can use any color as your background, it doesn't have to be green. Another popular background color is blue. But remember, white and black won't work, you need some saturated color like blue or green.
- since your flash will radically change the background color, you can assign a different key color for your live preview and your pictures.
- choosing your background color is fantastically easy: you can use a color picker to choose a color from a picture, you can assign some numerical color value using the Windows color dialog, or you can even have Photoboof pick the color automagically, using the most common color in the picture. To tune the background color, click Camera -> Greenscreen Options from your camera controller (Big Picture for Canons, Moving Images for webcams).
- you can set a specific background image for all the pictures, or you can use random backgrounds, which adds a nice dynamic touch to your printed layouts. I like to call this "improv mode", and it can be fun watching people adjust to their new background and decide what pose they're going to use.
- you can use any image file as a background, or a movie file, which can be interesting.
- you can optionally save the unmodified pictures, meaning the pictures without the background overlaid. This is useful if you want to do post-processing in Photoshop or whatever later.
Setting Greenscreen Mode
To set the greenscreen mode, go to Phortoboof --> Preferences --> Greenscreen. From there you can set the greenscreen mode, which currently is either "Static Background", meaning it uses a single background, or "Sequential", meaning it cycles through the greenscreen backgrounds in c:\photoboof7\backgrounds in order, or "Random Backgrounds", meaning it picks random background from c:\photoboof7\backgrounds, or "Show Background Chooser - 2 Choices", meaning users will be able to choose from 2 background categories at the start of the session, or "Show Background Chooser - 4 Choices", meaning users will be able to choose from 4 background categories at the start of the session, or "Show Background Chooser - 8 Choices", meaning users will be able to choose from 8 background categories at the start of the session.
A couple of notes about the greenscreen chooser:
- if you're letting people choose from 4 categories, Photoboof shows the file "background_chooser4.jpg" from your skin folder. So by default it shows c:\photoboof7\assets\default\background_chooser4.jpg. If you're letting people choose from 8 categories, it shows background_chooser8.jpg from that folder.
- the actual background images are in C:\photoboof\backgrounds\background_chooser. For example, button 1 (the top left button) picks images randomly from the folder C:\photoboof\backgrounds\background_chooser\button1. Button 2 (the one to the right of button 1) chooses from C:\photoboof\backgrounds\background_chooser\button2, etc. If you want to use just a single image for each category, delete everything from the folder except the image you want.
- and note that the existing categories are just to get you started, though of course you can use them as is. If you want to change the categories, you'd simply edit the chooser graphic (background_chooser4.jpg or background_chooser8.jpg) to taste. For example, if you wanted to replace the "landscapes" category with one called "animals", you'd edit the graphical file (background_chooser4.jpg or background_chooser8.jpg), replacing the "landscapes" button with one that says "animals". The Photoshop source file is included in c:\photoboof7\assets\default, and we're glad to help with this process if you need.
- and you can still let people choose different greenscreen backgrounds even without a touchscreen. For example, if you want to let people choose between two background images, you'll go to Preferences -> Greenscreen and set the "greenscreen mode" to "show background chooser - 2 options", and then you'll go to Preferences -> Triggers and set your first button to "touchscreen-1" and your second button to "touchscreen-2". Now when the first button is pressed it will behave as if you had a touchscreen and someone clicked button 1, and the other button will emulate the second touchscreen button.
Advanced Tip: when using random background mode, Photoboof chooses its background from c:\photoboof7\backgrounds, but also from any subfolders. And if you add "zzz" (i.e. three z's) to any folder name, it'll ignore that folder. This makes it possible to group your backgrounds and easily exclude some folders for certain events.
Configuring Greenscreen Color
To set the greenscreen background color, click the "Configure" button from Photoboof's greenscreen preferences. That will launch a dialog box in either Big Picture (if you're using a Canon camera) or Moving Images (if you're using a webcam). From there you can set both your color for the live preview, and for the pictures themselves. Note that you should uncheck "use same for live view and pictures" if you want to use different color modes for each, which is highly recommended if you're using a flash.
To pick the color using a color picker, click the "Pick" button. Note that you can press the F5 key to take a picture in Big Picture without applying any greenscreen effect, meaning you can easily use the color picker.
To pick the color using the Windows color dialog, click the color itself. In other words, click the square color swath immediately to the left of the "Pick" button.
My favorite method is to use the "detect" button, which picks the most common color present in a picture. Make sure no one is in your booth, and press the "detect" button. This is especially useful for quick tuneups during events as the lighting changes.
Advanced Tip: to see the camera's live preview while you're tuning the greenscreen properties, click Action --> Duplicate Live Preview in Photoboof. This will open a second live preview window so you can configure it.
Configuring Greenscreen Noise and Tolerance
Adjusting the noise and tolerance can help compensate for non-ideal lighting. In basic terms, noise is the distance from the border of the area that is keyed out, and tolerance is the variation in color of the key color. In other words, increasing the noise will make areas that are physically near your keyed out color be removed as well, and increasing the tolerance will make areas that are slightly different colors (shadows for example) key out as well. But don't let that explation confuse you, the easiest way to get the hang of it is to just experiment with it.
For starting value, I recommend noise and tolerance values of about 25.
Greenscreen Lighting
Good lighting is the most important part of greenscreen photography. You want a nice even lighting on your backdrop, and if possible minimal shadows. Since you probably won't be installing a full photographic studio in your photobooth, one way to cut down on shadows is to position people as close to the backdrop as possible. If there's no space between them and the backdrop, they can't cast shadows.
Greenscreen Fabric
To get any kind of greenscreen effect, you need a color saturated piece of fabric or paint. That means white or black absolutely won't work. Many people test it with a white sheet and think it doesn't work, but trust me, pick up some greenscreen fabric or paint from a photography supply store and you'll be amazed at the results.
As far as colors, the two main colors for chromakey photography (aka "greenscreen") are green and blue. The gospel is that green is better for brunettes and blue is better for blondes, but I say blue is better for everyone since people with frizzy hair are going to get a bit of a halo and I'd rather the halo was blue than green, and blue just looks much better when your booth isn't in use.
Finding Images
A great source of images for greenscreen backgrounds is Google Images. A good tip is to set the image size to "large". In general, images that are 1024x768 look good as greenscreen backgrounds. Of course you're on your own for clearing any copyright issues with any images you use.
Miscellaneous Greenscreen Notes
- when in random mode, you can always change the greenscreen background image by pressing the pause/break key on the keyboard, or the scroll lock key.
Greenscreen Troubleshooting
If your pictures aren't being processed for greenscreen, make sure "Enable Greenscreen" is checked in Big Picture's Camera menu.
If your live preview isn't showing your greenscreen image, make sure "show in live view" is checked in Big Picture --> Camera --> Greenscreen Options.
Foreground images let you set a foreground image over your live view and the finished picture, which lets you do things like add a frame over the image, or elements for the person in the picture to interact with.
You can set the foreground image either by going to Preferences --> Greenscreen from within Photoboof, or by specifying a foreground image in your custom layout file. The latter method is especially powerful since it allows you to let the user choose from multiple layouts, each with a different foreground image.
Pairing a Foreground Image with a Background Image
Sometimes you want to pair a greenscreen background with a specific foreground image. For example, maybe your background image is a picture of a dinosaur mouth, and the foreground image is some dinosaur teeth, giving the effect of the customer standing inside a dinosaur mouth. And whenever you're using that dinosaur mouth background (suppose the file is called "dino_mouth.jpg"), you want to use those teeth as the foreground (suppose that file is called "dino_teeth-fg.png"). Photoboof makes that very simple: just place the file named dino_teeth-fg.png in the same directory as your background. The important thing is that the filenames be exactly the same, except that the foreground image ends with "-fg" (as in "foreground"), and is a PNG file.
So for example, if your background image was named "mountains.jpg", your foreground image would be named "mountains-fg.png", etc.
It doesn't matter how you're specifying your background images, the above system will work whether you're using the same background image every time, or letting people choose their own background images, or using random backgrounds.
Letting Users Choose Their Foregrounds
If you're using the Greenscreen Background Chooser, this is easy, just put your foreground images in the folder with your greenscreen backgrounds, and put a "-fg" at the end of their filenames, as described in the section just above this.
But if you want users to be able to choose their own foreground images without using greenscreen backgrounds, you'll need to make multiple versions of your layout, each with a different foreground image specified. In other words, suppose your layout was called "double strip", and you have 4 different foregrounds you want your users to be able to choose from. You'll make 4 versions of the "double strip" layout, and specify a different foreground for each one. To specify the different foreground for each, you'll go to the "Extra Parameters" folder tab of the Layout Editor and paste in this line:
foreground_image = c:\photoboof\backgrounds\whatever.png
Obviously adjust that to the location of your foreground image. Then assign each layout to whatever trigger the user will be clicking. For example, if you're using a touchscreen, you'll set each touchscreen region to a different version of the layout.
Photoboof can record HD video with Canon and Nikon DSLRs and most webcams. The videos can be recorded at any resolution and framerate that your camera supports. A few notes on video in general:
- you tell Phtoboof to shoot a video by setting the action for that button or touchscreen region to "video". So go to Preferences -> Triggers and set some button to "video", or go to Preferences -> Touchscreen and set a touchscreen button to "video".
- by default the video length is set to 30 seconds, although the user can of course stop recording before 30 seconds are up. To change that default length, open Photoboof's configuration file by clicking File --> Edit Raw Preferences and search for "video_length". For example, if you want to record 30 second videos you'd make the line read:
video_length = 30
Or you can just click File -> Import Settings and paste in that line. So for example, if you want to make the videos 15 seconds long, you'd click File -> Import Settings and paste in the line:
video_length = 15
- the background files shown during video recording are inside your skin folder, which by default is c:\photoboof7\assets\Red Modern. The files used in video recording should be clearly labelled.
DSLR Cameras
- since the videos are recorded to the camera card and then transferred to the computer you don't need to worry about dropped frames or overloading your computer's CPU.
- since the videos are recorded to your camera's card, of course you need to have a card in the camera. And it needs to be relatively fast: an SDHC card, "class 6" or faster. The card's "class" is usually written on the card inside a small circle. The higher the class, the faster the card. If Photoboof stops recording prematurely it probably means you need a faster card in the camera.
- with Canon cameras, you set the video properties on the camera itself. In other words, you set the video resolution, framerate, etc., on your camera. To do that, disconnect the camera from your computer and find the video settings. On older Canon DSLRs you have to put the mode dial on the camera to the "video" setting, and then press the Menu button. On newer Canon DSLRs the video properties will be avaialble in Menu if there is an SD card in the camera.
- its a good idea to shoot a test video on the camera itself, disconnected from the computer, with the parameters you want. Once you have the settings configured, you can reconnect the camera from your computer. But note that when you connect it to the computer you need to take it off the Movie Record setting. Place the mode dial on Manual, TV or AV.
- its also a good idea to format your SD card, making sure nothing is on your SD card, before each event.
- if you get an error on the screen of your camera, you might need to restore factory defaults on the camera. To do that, disconnect it from the computer and press the Menu button and look for the "clear all settings" option. With older Canon DSLRs you need to put the mode dial on Manual, TV or AV. And it may be necessary to pull the battery, remove the SD card and then replace the battery to get past the error.
- and note that some Canon DSLRs have trouble recording video when the mode dial is set to "video". Try setting it to manual if you have a problem recording video.
Webcams
- you control the video properties in Photoboof's controller for webcams, which is the Moving Images window. Click Camera -> Video Options to configure your webcam. Here you'll choose which webcam you want to use (if there's more than one webcam detected on your system), and set the compression and video frame size.
- most modern webcams do very well recording at 1280x720 HD video, so to start you should select that as your frame size.
- for compression, its a good idea to set it to MOV, which uses the very fast and efficient H264 compression scheme. Note that to play these video back on your system you can install Quicktime (by visiting quicktime.com or installing iTunes), and/or install the excellent and free VLC movie player.
- in the Audio section, select the sound input device. If you're using the microphone on your webcam, select that as the Audio Device.
Photoboof has a very powerful GIF Creator feature that can produce animated GIFs from the pictures in a session, or even all the pictures in an event. The GIFs are extremely high quality, and you can control the size, the speed, and add a watermark or a border, and of course email or FTP them.
To turn on the GIF feature, go to Preferences -> Layout and check the box labelled "Make an animated gif". Now after each session a GIF will be placed in the /gifs subfolder of the Photoboof directory (usually c:\photoboof7\gifs). And whether or not this is enabled, you can always click Action -> Build An Animated GIF from within Photoboof, and it'll build a GIF from the last photobooth session or, if you just opened the program and there hasn't been a session yet, from test pics.
If you're using emailing and want to include an animated GIF with the emails, go to Preferences -> Email and check the box labelled "Send an animated gif?"
If you're using Photoboof's FTP feature and want to upload a GIF, go to the raw preferences file (File -> Edit Raw Preferences) and search for "ftp_upload_gif" and set that to yes, so the line will read:
ftp_upload_gif = yes
Note that creating GIFs is pretty processor intensive, especially for these high quality GIFs, so the computer will bog while the GIF is being created, especially if its a slow computer. A good trick if you're emailing or FTPing the GIF is to uncheck "Make an animated GIF" from Preferences -> Layout, so it won't create the GIF during the actual session. Then the Uploader will create the GIF when it uploads or emails the session, which you can do after the event if you simply close the Uploader window during your event. In other words, the upload queue will still be built (you can always see the files in Photoboof's /uploader_queue subfolder), and when that queue is processed after your event, the GIFs will be created at that time.
Video Version of the GIF
Since some services don't allow sharing of GIFs, Photoboof lets you also create a video verison of the GIF. You enable that on Preferences -> Layout by checking the box labelled "make a video gif".
Converting an Entire Event to a Single Animated GIF
Converting an entire event (or part of it) to an animated GIF is a super fun way to view all the pictures. To do it, copy whatever pictures you want to include to Photoboof's "/GIF Creator Folder" (by default, that's "c:\photoboof7\GIF Creator Folder") and Photoboof will process them all, and put the GIF in the "/gifs" subfolder of that directory ("c:\photoboof7\GIF Creator Folder\gifs"). Note that the GIF creation can take awhile if you're processing a lot of images, and will use a lot of CPU power so you shouldn't do this while a photobooth session is in progress.
Converting an Entire Event to a Series of Animated GIFS
If you worked an event but didn't have the GIF creation feature enabled, you can always use Photoboof's Monitored Folder feature to convert those pictures to animated GIFs of each session. To do that, simply drop the pictures from your event into c:\photoboof7\monitored_folder, and Photoboof will produce the GIFs of each session and place them in c:\photoboof7\monitored_folder\gifs.
Advanced Tip: You can fine tune the GIF by going to the GIF Section of Photoboof's configuration.ini file. So click File -> Edit Raw Preferences to open the config file, then search for "GIF Section". If you don't see that, close the config file and click File -> Update Config file from within Photoboof, then restart Photoboof and repeat this step. The GIF Section should then be present, and it contains these values:
gif_longest_edge = 500
gif_duration = .5
gif_border_style = none
For example, if you want to make a larger gif, you'd change the value for "gif_longest_edge". Note that increasing the size will greatly increase the processing time to create the GIF.
If you want to change the amount of seconds each frame in the GIF is displayed for, change "gif_duration". For example, if you want each frame of the GIF to appear for 1.5 seconds, you'd change that line to read "gif_duration = 1.5".
If you want to add a border to thte GIF, change the "gif_border_style". Currently the options are "sloppy1", "sloppy2", "sloppy3", "sloppy4" or "none". If you want to create your own border, see the next Advanced Tip.
Advanced Tip: If you want to add a watermark to the GIF, put a transparent PNG with your logo in Photoboof's /layouts subfolder with the filename "gif_watermark.png". So if you installed Photoboof in the default location, the full filename would be c:\photoboof7\layouts\gif_watermark.png. That logo gets placed at the bottom right of the GIF.
If you want more control, or want to make your own border, you can use the gif_overlay.png file, which is a file named "gif_overlay.png" in Photoboof's /layouts subfolder. So if you installed to the default location, the full filename would be c:\photoboof7\layouts\gif_overlay.png. That file gets placed over the completed GIF. Note that it should be the same pixel size as the GIFs you're making. In other words, if Photoboof is making GIFs that are 500x375 pixels, gif_overlay.png should also be 500x375.
If you want a separate overlay for each frame of the gif, create your overlays (for example, create 1.png, 2.png, 3.png and 4.png) and save them to your layouts folder (c:\photoboof7\layouts). Then in the config file add this line:
gif_foregrounds = 1.png, 2.png, 3.png, 4.png
And note that to make these transparent files in Photoshop, you'd export from Photoshop as PNG-24. So in Photoshop click File -> Save For Web, then for format choose "PNG-24" and make sure the "transarency" box is checked.
After an event you might want to build a video slideshow of all the pictures from the night. Photoboof makes that easy, just copy all the pictures to the Video Slideshow Creator Folder in Photoboof (by default that's c:\photoboof7\Video Slideshow Creator Folder) and Photoboof will make a video out of them. It'll place the completed video in the /videos subfolder.
Note that this is processor intensive, so you probably don't want to do this while the computer is being used to run the photo booth, and if you have a lot of pictures it might take a few minutes to build.
Advanced Tip: You can optionally customize the video with a watermark and a soundtrack, and change the timing by editing the config file. Note that if any of these variables don't appear in your config file, you can click File -> Update Raw Preferences File to add them.
To add a watermark, make a transparent PNG and edit these values in the config file:
video_slideshow_watermark = c:/my watermark.png
video_slideshow_watermark_x_offset = 0
video_slideshow_watermark_y_offset = 0
Note that the watermark is pasted at the bottom right of the video, and you can fine tune its placement with the offset values.
To add a musical soundtrack, edit the video_slideshow_soundtrack variable in the config file:
video_slideshow_soundtrack = c:\my soundtrack.mp3
By default Photoboof produces a video that's 1280 pixels on the longest edge (780p), but you can change that to whatever side you want. To make it 1080p change the video_slideshow_longest_edge value to 1920. Note that the larger this gets, the more processing power it takes to build the video, and the larger the video file becomes.
video_slideshow_longest_edge = 1920
You can also change the timing of the slideshow. By default it shows every picture for half a second, but you can modify that with the video_slideshow_frame_duration value. For example to make each picture appear for a full second, you'd make that equal to 1:
video_slideshow_frame_duration = 1
On Photoboof's Preferences -> Layout folder tab, there's a checkbox labelled "Picture Confirmations?". If checked, Photoboof will ask the user whether they want to keep or retake each picture.
Note that the graphics displayed (the yes button, no button and the dialog) are all in the skin folder, which by default is c:\photoboof7\assets\default.
Advanced Tip: You can fine tune the look of it in the configuration file (File -> Edit Raw Preferences) by searching for and modifying these variables:
# This determines whether the actual question (confirmation-dialog.jpg)
# is shown. For example, you might want to hide it if your yes/no buttons
# say something like "keep" and "retake". (yes/no)
show_confirmation_question = yes
# This is the timeout in seconds that we'll wait for an answer. If
# you don't want any timeout, set this value to 999999 or something high.
confirmation_timeout = 30
# Do you want to limit the amount of times people can retake their pictures?
# (0 for unlimited, or, for example, 3 to limit people to 3 retakes)
retake_limit = 0
# Photoboof positions the dialog question and buttons, but you can fine tune
# their positions here
dialog_offset_x = 0
dialog_offset_y = 0
buttons_offset_x = 0
buttons_offset_y = 0
# Spacing between the buttons
buttons_margin = 30
There are two options for vertical camera orientation: rotating only the camera, or rotating the camera and the monitor. Each method has its advantages: rotating the camera and the monitor gives you the option of using your entire monitor to display the pictures, but rotating only the camera gives you the option of switching between vertical and horizontal camera orientations without having to reposition your monitor.
Make this configuration in Photoboof --> Preferences --> Camera --> Camera Orientation.
If you rotate the camera but not the monitor, choose "vertical - unrotated monitor". You may want to use the skin called "vertical2", which you set in Photoboof --> Preferences --> Layout --> Skin.
If you rotate the camera AND the monitor, choose "vertical - rotated monitor" for the Photoboof --> Preferences --> Camera --> Camera Orientation, and you use the skin "vertical" in Photoboof --> Preferences --> Layout --> Skin. And remember to rotate your camera 90 degrees counter-clockwise, and your monitor 90 degrees clockwise. You might want to do some tests before cutting any holes for your monitor.
The Live Preview lets your customers orient themselves to the camera before the picture is taken. Not every camera support live preview natively: all the supported Canon Powershots do, most of the supported Canon DSLRs do, and all webcams do. But note that even if you're using a camera that doesn't support live preview, you can install a webcam in your booth and use that for the live preview.
Like most camera configurations, you adjust the live preview in Preferences --> Camera in the main Photoboof window, which is shown below:
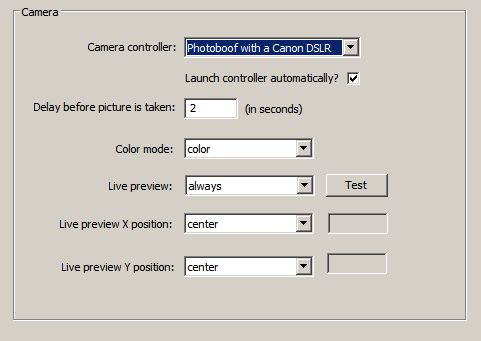
Next to "live preview", you can set the live preview to one of three modes: "intro", which shows the live preview only before the first picture is taken, "yes", which shows the live preview before each picture is taken, and "always", which shows the live preview before each picture is taken and stays on the screen a bit longer than the "yes" mode. Most people prefer the "yes" mode, since the live preview freezes while the picture is being taken, and in the "always" mode you see this freeze.
Photoboof gives complete control over where you'd like to place the live preview on your viewer screen. You set the position using the "live preview X position" and "live preview Y position" above. If you decide to specify the position instead of centering it, you might want to use the "Test" button to test the current placement. Photoboof will show you the live preview for a few seconds so you can verify the position.
If you want to change the background image for the live preview, including the border surrounding it, edit the file msg_start-preview.jpg in your skins directory, which by default is c:\photoboof\assets\default. See the advanced tip below to use a different graphic for each picture.
Note that Canon Powershots send a very low resolution live preview (320x240 pixels), but Photoboof stretches it to a usable size. Photoboof can't help that its somewhat pixellated. One thing that greatly improves the live preview image quality is some ambient light in your booth. With sufficient light the live preview from a Canon Powershot works very well to help the customers orient themselves in the camera frame. Also remember to take a picture after changing your camera settings or the amount of light, which updates the camera's live preview settings.
Canon DSLRs send a much higher resolution live preview (928x616 pixels), but they still like lots of light to make the image clear. And not all Canon DSLRs can send a live preview, there's a list on this page.
At the bottom of the Camera tab of Photoboof's preferences, is a checkbox labelled "use webcam for live preview". If you'd like to use a webcam for your live preview even though you're using some other camera as your main photobooth camera, check this box.
Advanced Tip: since the Live Preview isn't a true mirror image, when people inside the booth move left they will appear to move right on the computer screen, which can be disorienting. If you'd like to mirror the live preview, in the camera controller (CanRemoter) go to Camera --> Live View Options --> Mirror Live View.
Advanced Tip: you can optionally have a different live preview background graphic for each picture taken, or even choose a random one. Remember that the default graphic shown in the background of the Live Preview is msg_start-preview.jpg in your skins directory. if you want different live preview background graphics for picture 2, for example, you'd place a file there named msg_start-preview-2.jpg. To have a custom background for picture 3, you'd have msg_start-preview-3.jpg. To pick a random background for each picture, you'd create files with names like msg_start-preview-a.jpg, msg_start-preview-b.jpg, msg_start-preview-c.jpg, etc.
Advanced Tip: by default the 3-2-1-0 countdown appears directly below the Live Preview, but this is adjustable in the configuration.ini file. Open the file (File --> Edit Raw Preferences) and look for the variables cheese_pos_x and cheese_pos_y. By default cheese_pos_y (the Y position of the countdown) is set to "auto", which positions it right below the Live Preview, but you can specify some numbered value. For example, setting cheese_pos_y = 60 will make the countdown graphic appear at the top of the Live Preview screen.
Advanced Tip: you can create a second, permanently visible Live Preivew by clicking Action --> Duplicate Live Preview on the main Photoboof window. This is useful for keeping an eye on what's going on inside the photobooth when you have your head stuck inside the back of the booth, which is where we spend most of our time when staffing the booth. Note that you can only do this if you have a secondary monitor installed, since otherwise it would be visible to people inside the booth. See the Dual Monitor Support section below for information on setting that up. Let me know if you have some other use for a second Live Preview and I'll implement it. As a sidenote, note that you can spawn your own secondary Live Preview windows by choosing Camera --> Live Preview Options --> Duplicate in CanRemoter. If the Live Preview appears on some other monitor, right-click its icon in the taskbar and choose "Reset Window Position".
Advanced Tip: if you're using a smaller screen resolution, like 800x600, you'll probably want to set the live preview to "small". You do this on the Camera preferences page. After doing so you'll probably also want to edit the background graphic for the live preview, which is in your skin folder (by default, c:\photoboof\assets\default), and the file is called msg_start-preview.jpg. We'll be adding stock graphics for this shortly, feel free to send an email if you'd like to give us a little nudge...
Advanced Tip: you can optionally trim the live preview to be any size you want. For example, if you're cropping the pictures in your Layout, you may want to trim the live preview so its an accurate preview of the printed picture. To do this, edit your config file (click File -> Edit Raw Preferences) and search for these variables:
live_preview_trim_top = 0
live_preview_trim_bottom = 0
live_preview_trim_left = 0
live_preview_trim_right = 0
If you dont' see those variables, click File -> Update Raw Preferences File to add them and then open the live preview again. It should be pretty straight forward how to edit from there. For example, if you want to get a square live preview and you're using the large live preview size, you'd set both live_preview_trim_left and live_preview_trim_right to 80. And note that after setting all those values to 0 you should restart Photoboof. Or, if you want a square live preview, you can simply make a layout that has the "camera type" set to "square pictures", and the live view, picture review and the layout will all use square pictures.
Advanced Tip: you can optionally curve the corners of the live preview. To do this, edit your config file (click File -> Edit Raw Preferences) and search for this variable:
live_preview_curve = 0
To add a little curve, set that value to 30. To add a curve similar to the corners of iPad icons, set that to 50. And to get rid of the curve, set it back to 0. Note that after resetting this to 0 you should restart Photoboof.
The Viewer is intended to be seen by people inside the photobooth, but isn't necessary to run Photoboof. In other words the people inside the booth don't need to see themselves, especially if you enable sounds. But its nice to let the people inside the booth see themselves, and that's where the Viewer comes in.
I highly recommend getting a second monitor to place inside the booth for the Viewer. Have a look at the dual monitor section for notes on that.
See Skinning Photoboof for notes on customizing the graphics in the Viewer.
See Live Preview for some notes on tweaking the live camera preview inside the Viewer.
One important note is that the F1 key closes the Viewer, which is very important to know when the Viewer launches on your main monitor...
If the you're having trouble getting the Viewer's "say cheese" (countdown-0.png) graphic to appear at the same moment your camera is taken a picture, go to Preferences --> Camera and adjust "delay before picture is taken".
Another note is that you can make it so Photoboof doesn't show each picture after its taken by opening the config file (click File -> Edit Raw Preferences) and search for the line "picture_delay_after", which is the amount of seconds each picture is shown after being taken. Set that to 0 seconds and the pictures won't be shown. Also note that you can prevent the countdown from appearing before each picture by setting "picture_delay_before" to 0, which you can do either in the configuration file or by clicking Preferences -> Camera and adjusting the value for "delay before picture is taken".
Advanced Tip: If the "say cheese" graphic stays on your screen longer than you'd like, the first thing to try is to shrink the picture size so the processing is faster. If you're using a Canon camera, you do that in Big Picture, in the area on the right, something in the "medium" range usually works best. If its still too long, you can optionally place a file called "developing.jpg" in your skins folder, which will be shown until your picture appears. Its sort of a "one moment while the picture develops" graphic. This is especially useful if you're using photo effects like the oil painting effect, which take a few seconds to process.
Advanced Tip: By default the countdown is 3 seconds, but you can extend that to any length you'd like by placing extra countdown graphics in your skin folder. For example, if you want your countdown to be 5 seconds long, place files called "countdown-4.png" and "countdown-5.png" in your skin folder (which by default is c:\photoboof7\assets\default). You should probably match the size to your existing countdown graphics to avoid jarring transitions, and the stock countdown graphics are a good size for countdowns. After adding these files, you'll need to go to Preferences -> Camera and increase the value for "Delay before picture is taken". For example, if you added two countdown files, you'll increase the value of that by 2 seconds, meaning if "delay before picture is taken" was set to 2.5 seconds, increase it to 4.5 seconds. FYI, you use this value to fine tune the timing of the flash, so if the "say cheese" isn't timed properly with your flash, adjust this value.
And if you want to add time to the countdown before the countgraphics are shown, adjust the value of "countdown_pre_delay" in the configuration.ini file.
Advanced Tip: If you'd like to show a Flash movie instead of the static ready.jpg graphic so when people enter the booth they see an animation, create a Flash movie and name it ready.swf and place it in your skin folder (by default that's c:\photoboof7\assets\default). Note that you'll need Flash installed system wide for that, so visit flash.com using Internet Explorer. And to disable that animation, either delete or rename your ready.swf file.
Advanced Tip: You can also display a video instead of the static ready.jpg. To do that, make a Quicktime movie called ready.mov or ready.mp4 and put it in your skin folder (by default that's c:\photoboof7\assets\default). Note that you'll need Quicktime installed, which you can do by visiting quicktime.com. And to disable that animation, either delete or rename your ready.mov file.
And to enable video, you'll need to change the variable "viewer_enable_video_assets" to "yes" in the config file, which you do by clicking File -> Edit Raw Preferences, and then search for "viewer_enable_video_assets" and make the line read:
viewer_enable_video_assets = yes
Or just click File -> Import Settings and import that line. Then restart Photoboof.
Note that if Quicktime isn't installed, Photoboof will crash on startup when video assets are enabled, so make sure its installed if using this feature.
Advanced Tip: If you'd like to extend the length of the countdown, which by default is 3 steps, you can edit the value of countdown_length in the config file. For example, if you wanted the countdown to be 5 steps long (5, 4, 3, 2, 1, 0), you'd make the line look like:
countdown_length = 5
You can do that by editing the config file directly (click File -> Edit Raw Preferences) or by clicking File -> Import Settings and pasting that line in.
Photoboof has a slideshow feature that can be run from the same computer that's running Photoboof, or from a networked computer. The Slideshow looks beautiful on a monitor on the side of your booth, or better yet through a projector. It cycles through past pictures when no one is using the booth, and shows new pictures fullscreen as they're taken. It really is quite beautiful if I do say so myself.
Some notes on how it works:
- to enable the Slideshow, go to Preferences --> Slideshow from within Photoboof. After enabling it you'll need to restart Photoboof.
- you can launch the Slideshow on any monitor by clicking File --> Launch Slideshow from within Photoboof.
- if you'd like, you can also access the Slideshow through a web browser, which means you can access it over a wireless network. Install a wireless router in your booth and make your own wireless network (no internet connection needed) and you can access your Slideshow wirelessly. Note that if you're connecting using a webbrowser, you can even use a Mac. See the "Advanced Tip" below for more notes on connecting through a network.
- to edit the pictures shown in the Slideshow, edit the folder c:\photoboof7\pics_slideshow (assuming Photoboof is installed to c:\photoboof7). Note that you can delete anything you want without affecting the pictures that are saved by Photoboof. In other words the pictures in that directory are *only* used by the Slideshow. After you delete some pictures you'll need to tell Photoboof to update the Slideshow, which you do either by running a photobooth session, taking a preview picture, or clicking Action --> Force Slideshow Update.
- note that Photoboof only produces the pictures for the Slideshow if the Slideshow is enabled. So if you expect to use the Slideshow later in an event, you should keep it enabled the whole time in Preferences --> Slideshow, even if you're not displaying it.
- note that the computer displaying the Slideshow must have Flash installed. A good way to make sure Flash is installed system-wide is to visit flash.com with Internet Explorer and let it install from there.
- and note that you can press the F2 keyboard key to show/hide the slideshow.
- Start Photoboof.
- Open preferences window (File>Preferences in the main window) and click on the "Slideshow" tab.
- Check the "Enable Slideshow" box at the top and check "Enable remote slideshow" near the bottom. Make changes to other settings per your preferences (Just leave the other settings alone for now. You can adjust these to your liking once everything is up and running.)
- Click "OK" on the Preferences window and then restart Photoboof.
- Photoboof set-up is now complete.
- Next, right click the wireless network connection icon next to the clock on your booth computer and click on "Status". A new window will open.
- Then click on the "Support" tab, and write down the number noted as your IP Address (It will look like 192.168.1.xxx). Hold on to this for setting up your slideshow computer.
- Configuring the firewall should be as simple as simply starting Photoboof and, when the Windows firewall asks if you'd like to add a firewall exception for the program, selecting yes, but here's instructions to manually add an exception for Photoboof just in case:
- Double click "Security Center"
- Click on "Windows Firewall"
- A new window will open with 3 tabs. Click on the "Exceptions" tab.
- Next, click the "Add Port" button located below the list of exceptions.
- A new window will open asking for the exception info.
- Enter the following- Name: Photoboof7.exe, Port Number: 80, leave TCP checked and click "OK".
- Next click "OK" on the Windows Firewall window, and close Control Panel.
- You are done setting up Windows firewall.
- Connect your booth computer to your wireless router if it has not already done so.
- Configuring the firewall should be as simple as simply starting Photoboof and, when the Windows firewall asks if you'd like to add a firewall exception for the program, selecting yes, but here's instructions to manually add an exception for Photoboof just in case:
- Open Control Panel on the booth computer.
- Click on "Windows Firewall"
- Click "Allow a program or feature through Windows Firewall" in menu to the left.
- A list of programs allowed to communicate through the firewall will be displayed.
- Next, click the "Allow another program..." button located below the list. (You may need to click "Change settings" before this button will become active)
- A new window called "Add a Program" will open. Click "Browse...".
- Navigate the search window to your Photoboof folder (by default that's c:\photoboof7), then select "Photoboof7.exe and click "Add".
- Next click "OK" below the list of allowed programs.
- You are done setting up Windows firewall.
- Connect your booth computer to your wireless router if it has not already done so.
- Configuring the firewall should be as simple as simply starting Photoboof and, when the Windows firewall asks if you'd like to add a firewall exception for the program, selecting yes, but here's instructions to manually add an exception for Photoboof just in case:
- From the start screen navigate to your desktop.
- Swipe in from the right-hand edge of your screen to pull up the Charms panel.
- Select "Settings", and then "Control Panel" on the next window.
- Select "Windows Firewall" once you're in Control Panel.
- Click "Allow an app or feature through Windows Firewall" in menu to the left.
- A list of programs allowed to communicate through the firewall will be displayed.
- Next, click the "Allow another app..." button located below the list. (You may need to click "Change settings" before this button will become active)
- A new window called "Add an app" will open. Click "Browse...".
- Navigate the search window to your Photoboof folder (by default that's c:\photoboof7), then select "Photoboof7.exe and click "Add".
- Next click "OK" below the list of allowed programs.
- You are done setting up Windows firewall.
- Connect your booth computer to your wireless router if it has not already done so.
- Turn on Computer and connect it to your router.
- Open Internet Explorer.
- Enter the IP Address of your booth computer in the browser (as though you are entering a web page) and press enter. You will see the slideshow home page. This page will give you the different slideshow options to choose from.
- Click on the slideshow you want and press F11 to put IE in fullscreen mode.
- Take photos with your booth and watch them load into your slideshow.
- You're done!
Advanced Tip: Remotely Accessing the Slideshow. If you're going to connect to Photoboof over a network using a web browser, there are a few things you should be aware of. Most importantly, Photoboof acts as a webserver to allow the remote computers to connect, which means you'll need to leave port 80 open in your firewall.
Photoboof Set-up
Firewall Setup (Photoboof Computer - Windows 7):
Firewall Setup (Photoboof Computer - Windows 8):
Slideshow Computer Set-up (all versions of Windows):
Photoboof works best when you have two monitors connected to your computer, one on the front of your booth for the customers to see, and another inside your booth for you to see program messages, printer messages and usage info. You can plug a second monitor directly into the VGA jack on the back of most laptops, or you can get a dual head video card for your desktop computer.
Note that there are two different dual monitor modes in Windows: "clone mode" where both monitors show the same thing, and "extended desktop mode", where the second monitor is unique and shows an extension of the main monitor. In "extended desktop mode" if you drag your mouse to the right, your mouse will appear on the second monitor. This is the mode you want. Here are some notes for setting this up in Windows:
1) reboot with the second monitor attached. This may be all you need to do, but if your second monitor isn't displaying an extension of your desktop (you shouldn't see the Windows taskbar across the bottom of the monitor), continue with these steps.
2) go to Control Panel
3) in Windows XP, go to Display. In Windows Vista, go to Personalize and then Display. In Windows 7, go to Control Panel and then Hardware and Sound and then click "Connect to a Projector", then "Extend". In Windows 7, that's the last step you'll need to do, but Vista and XP will have to continue to the next step below.
4) Click the "Settings" folder tab, and you should see two monitors. Click on your second monitor and then click the checkbox "extend my desktop to this monitor". On some computers you'll have to adjust the screen resolution using the slider on this dialog, make sure your screen width is at least 1024 pixels wide.
5) When you click the "Identify" button you should see a "1" on your primary display, and a "2" on your secondary display. If you see "1" on both, you're in clone mode and you need to go through these steps again.
If you're using a touchscreen, you'll need to run the manufacturer's "multi monitor configuration utility" after performing these steps.
Photoboof can upload each picture and/or strip as they're taken by the booth.
There are some nice features:
- If your booth is off-line, it will be an upload queue and process the uploads whenever it finds an internet connection, and this queue will survive even after you restart Photoboof.
- You can choose to upload the individual pictures, the strips, or both.
- You can tell Photoboof to put these in separate folders (one folder for the pics, and one for the strips), or the same.
- You can shrink your strips and/or pics before they get uploaded.
- You can specify a separte layout for FTP uploading. In other words, you can upload a different layout than what gets printed from your booth.
- You can upload to non-standard FTP ports.
To configure FTP uploading, go to Preferences -> FTP.
Photoboof can upload to Facebook two different ways: either by uploading all sessions to a single Facebook account, or by letting users share to Facebook directly from the booth.
Uploading to a Single Facebook Account
To upload all the sessions to a single Facebook account, go to Preferences -> Facebook, and check the box that says "Enable Facebook Uploading", and for "Facebook Mode" select "Bulk Upload to a Single Facebook Account".
You'll then want to set the Facebook album and album caption, what to upload (pics, strips or both). If you're on a slower connection you may want to resize the pictures before uploading them, which you do by setting the pic and/or strip size ("full" means keep them fullsize, or you set the width, for example 500 pixels wide, to shrink them before uploading).
Below that, in "strip layout", you can specify a special layout for Facebook uploading.
And if you're uploading to a Business Page, instead of your main Facebook account, put the Business Page name next to where it asks for "Business Page". For example, if your business page name is "Cheesy Photobooth", you'd simply put "Cheesy Photobooth" there.
Now after the first session the Uploader window will show a button to login if you haven't logged in already. You'll need to log in to Facebook once, and then it will keep you logged in.
Letting Users Upload Directly to their Own Facebook Accounts
To let users upload sessions to their own Facebook accounts, Preferences -> Facebook, and check the box that says "Enable Facebook Uploading", and for "Facebook Mode" select "Upload to Individual User Accounts".
You'll then want to set the Facebook album and album caption, what to upload (pics, strips or both). If you're on a slower connection you may want to resize the pictures before uploading them, which you do by setting the pic and/or strip size ("full" means keep them fullsize, or you set the width, for example 500 pixels wide, to shrink them before uploading).
Below that, in "strip layout", you can specify a special layout for Facebook uploading.
And for now, to use the on-screen keyboard you'll need to purchase the "runtime keyboard" from this location, which costs $15. Its the cleanest and nicest onscreen keyboard we've found. Note that you can keep it installed to its default location, or if you're going to be deploying to several booths you can copy it to Photoboof's util folder (c:\photoboof7\utils) if you'd like to keep everything together.
Users will then be prompted to log into Facebook at the end of the session, and Photoboof will upload the pictures and/or strips, depending on your choices above.
And if you're using XP and having trouble logging into Facebook, you may need to update your version of Internet Explorer, which is used by the login routine. You can use this link.
Advanced Tip: you can optionally set up Photoboof so it uploads through your own Facebook app. The advantage is that when people upload their images through Photoboof, they'll now see your company name in the "Uploaded By" credit on Facebook.
Facebook recently changed their system for app approval, please email us if you need to set this up.
A really nice way to handle sharing is to let users do it outside of the booth. That keeps things moving at the booth, and lets them take their time sharing their pictures outside the booth. Photoboof has a fantastic iPad app that lets people share to Facebook, Twitter, email the pictures, send the pictures via text message, and view a slideshow. And its free for all Photoboof users! Details are at photoboof.com/ipad.
Every part of Photoboof that the customer sees, both inside the booth and on the printed strips, can be customized. And I don't just mean that you can change the wording, you can change the entire look of all the assets, using your own custom graphics. Its all very easy once you get the hang of it.
Assuming you haven't yet created your own Photoboof skin, all graphical assets are by default in the c:\photoboof\assets\default folder.
You can edit the graphics directly in that folder, or copy the whole folder to make a second "skin". For example, if you want to make a skin just for weddings, you'd copy c:\photoboof7\assets\default to c:\photoboof7\assets\weddings (or whatever you want to call it). Then to use that skin, you'd go to Preferences -> Layouts and set the "skin" to "wedding". And with that one change, the whole look and feel of your both will be changed. Handy!
The best way to see what graphics appear when in the sequence is just to open the skin folder, which you can do either by opening the folder in Windows Explorer, or go to Preferences -> Layout and click the "show" button next to your skin. Here's a list of all the graphics, and please email us if you need help modifying them, or have any questions about specifics:
msg_initialize.png - shown when Photoboof first launches.
ready.png - shown when Photoboof is ready for the next customer. The "press the button to begin" graphic. Note that you can optionally show a movie file by including a file named ready.mov or ready.mp4, or a Flash file by including a file named ready.swf. And to disable movie or Flash mode, simply remove those files. And if you'd like rounded edges on your graphic, save it as ready.png and Photoboof will use that.
msg_start.png - shown right after the customer presses the start button if you're not using a live preview from the camera.
msg_start-preview.png - shown during the camera's live preview. See the live preview section if you'd like to use a different live preview background for each picture of the photobooth session.
countdown-3.png, -2.png, -1.png, -0.png - these 4 files are the countdown shown before the pictures are taken. Note that you can increase the countdown length if you want, see the advanced tip here.
developing.jpg - an optional file shown after countodown-0.png but before the fullscreen picture is displayed. Note that this file isn't present by default, but you can add it to your skins folder if you want to show a "developing" graphic.
background_chooser.png - this is shown if you're letting users choose their greenscreen backgrounds. In other wrods, if you go to Preferences -> Greenscreen and set the greenscreen mode to one of the choosers. If you give people two background options Photoboof will show background_chooser2.jpg, if you give people 4 background options it'll show background_chooser4.jpg, and if you give people 8 background options it'll show background_chooser8.jpg. You can download the Photoshop source files here, and there's more notes on this feature here.
button-no.png and button-yes.png - these are shown when Photoboof asks the user questions, such as if they want to retake a picture or share the session to Facebook. Note that these can be saved as PNG files with rounded edges if you'd like.
color_chooser1.png - if you're letting people choose their color mode at the start of the sequence, these are shown. There's more notes on this feature here.
confirmation-dialog.png - if you're asking people whether they want to retake their pictures (which you enable on the first Preferences screen), this is the graphic that asks them if they want to retake the picture. Note that these can be saved as PNG files with rounded edges if you'd like.
facebook-dialog.png - if you're letting people upload to their indivdual Facebook accounts, this is the graphic that asks if they'd like to share to Facebook. It can be saved as a PNG with rounded edges.
facebook-loading.png - while Photoboof is trying to connect to Facebook, this graphic is displayed.
facebook-error.png - if there's an internet error when trying to upload to Facebook, Photoboof shows this graphic.
facebook-logout.png - shown after the user has been logged into Facebook, while the photos are uploading. If you want this to cover your whole monitor, you should make the graphic the size of your monitor.
focus_error.png - shown if your camera can't take a picture because of a focus issue.
print_chooser.png - shown if you're letting people choose whether they want to print their session or not. You set this by clicking File -> Printer Configurations and set the number of prints to "Ask How Many (yes or no)". The Photoshop source file is here.
print_chooser2.png - shown if you're asking people how many prints they'd like, with options of zero through three copies. In other words, they can choose not to print their session, or 1 through 3 copies. You enable this by going to File -> Printer Configurations and set the number of prints to "Ask Yes or No (0-3)". The Photoshop source file is here.
print_chooser3.png - shown if you're asking people how many prints they'd like, with options of one through four copies. You enable this by going to File -> Printer Configurations and set the number of prints to "Ask Yes or No (1-4)". The Photoshop source file is here.
print_chooser_ending_message.png - shown after they're shown the print chooser (in other words, either how many prints they'd like or if they'd like a printout). Not shown if you're always printing the same number of prints.
video_recording_background.png - shown while video is being recorded.
video_restart.jpg and video_stop.png - the video start and stop buttons.
video_warning_background.png - shown in the background before the video starts recording.
video_warning-1.png, video_warning-2.png, video_warning-3.png - the video "preroll" buttons. In other words, these are shown before the video starts recording.video_finished.png - shown when video recording is finished.
msg_finished.png - shown at the end of the sequence. The "your printout should be ready in a moment" graphic.
If you're using a bill acceptor and money mode, the credit#.jpg files are shown when money is inserted. For example if 3 credits are inserted the credit3.jpg file is shown. And while there's not enough credits to start, the file not_ready.jpg is shown.
Note that the sound files also appear in this folder. See the Sounds section below.
And note that if you want to change the background color of your viewer (which by default is black), change the viewer_background.jpg file is in the /assets subfolder of Photoboof. For example, if you want your viewer to have a blue background, you'd make a small blue tile, whatever size you want but 400x400 pixels is a good starting point, and save it as c:\photoboof7\assets\viewer_background_tile.jpg. And you could, alternatively, use something more graphical, if you want a different effect.
Photoboof sings! On the simple side you can play a camera click when each picture is taken, which is handy if you're not using a camera flash. Or you can get fancy and play sounds throughout the photobooth session.
Have a look at Preferences --> Sounds in Photoboof. You'll see a checkbox to enable the camera click sound, and a way to add a delay before the sound is played. Experiement with the delay until you get the sound aligned perfectly with the moment your camera takes the picture. Decimals are fine. Note that this sound lives in c:\photoboof7\click.wav if you want to change it.
You'll also see a checkbox called "play picture sounds". This lets you play sounds at various moments throughout the photobooth session:
intro.wav - played at the start of the photobooth session.
background_chooser.wav - played when the background chooser is shown (if enabled)
color_chooser.wav - played when the color chooser is shown (if enabled)
live_view.wav - played when the live view first appears.
countdown-#.wav - played at each step of the countdown. For example, countdown-3.wav is played
when the countdown is at "3", countdown-2.wav is played when the countdown is at "2", etc.
picture#.wav - played before each picture is taken. For example picture1.wav is played before picture 1 is taken.
print_chooser.wav - played when the print chooser is shown (if enabled)
finished.wav - played at the end of the photobooth session.
Note that the included sounds are meant as starting points, you'll probably want to record your own. These sounds are located in your skins folder (by default c:\photoboof7\assets\default). Let me know if you need sounds played at any other points in the sequence. And if you don't want a sound played at a given point, just delete the sound file.
You can start the photobooth session using keys on the keyboard, a mouse, a touchscreen, joystick buttons, from some other program, with an Eco Button, Griffin Powermate, or using arcade buttons attached to your USB port, microphone jack, or serial port. By default Photoboof starts the sequence when the F12 key is pressed on the keyboard, but it's *highly* recommended that you use an arcade-style button attached to your soundcard, serial, or USB port, which, incidentally, is included when you buy your license.
Note that you can also assign any button to start Photoboof in different color modes (black & white, sepia, color, negative, oil painting, sketch), any layout (maybe you want one button to produce a double strip, the other to start a 6-up layout), or to reprint the alst session.
To configure the buttons, go to File --> Show Preferences --> Triggers.
Serial / USB Port Buttons
The best way to trigger Photoboof is a button or buttons that attach to your serial or USB port. The big advantage here is that not only can you use regular arcade buttons, which look very professional and are built to take tons of abuse, but you can have multiple buttons connected, each starting Photoboof in a different mode. This is the type of button that comes free with your Photoboof license, but if you'd like to build one yourself, here are some instructions.
Even if your computer doesn't have a serial port (most modern laptops don't), you can use a USB to Serial adaptor. When you buy a license, let me know your button choice and we'll mail you out a button assembly, wired and tested and ready to plug into your USB port.
Go to Radio Shack and get part number 276-1538, "9-position female d-sub connector", also known as a DB9 jack. I like the solder style. Then connect the pins of the DB9 jack to the buttons like so:

For example, if you only want a single button, you'd wire the common pin of your button to pin 4 on your serial port, and the NO (normally open) pin of your button to either pins 1, 6 or 8 of your serial port. Using 24-guage speaker wire available at Radio Shack fits in the db9 jack nicely.
If you want multiple buttons, you'd connect the common pins of each button to Pin 4 of your DB9 jack, and the NC (normally closed) pin of each button to either pins 1, 6, 8 or 9 of your DB9 jack. Only one button per pin, so you'd be wiring the NC pin of each button to a different DB9 pin.
You can also wire your bill acceptor to your USB harness. Most bill acceptors have wires that pulse when bills or coins are inserted. Wire these to pin 4 of the DB9 jack and either pins 1, 6, 8 or 9. Note that buttons and bill acceptors can share pin 4 of the DB9 jack.
If you're connecting this to a USB port, as most people do, use a USB to Serial adaptor.
To test your button harness, you can either use Photoboof, or the Serial Tester program in c:\photoboof7\utils\Serial Tester. If using the Serial Tester, open the program and tell it which com port your button harness is connected to (to find that out go to Device Manager by going to Control Panel --> System --> Hardware --> Device Manager --> Ports) , then run serial_tester.exe and press the button... If it says "button pressed!", its working.
When you're done, tell Photoboof what com port your button is attached to by going to File --> Show Preferences --> Triggers in Photoboof. Note that you can select "auto" and Photoboof will try to detect it for you.
Note that if you're using a button sent to you with your Photoboof license, here's the driver.
Advanced Tip: if you'd like, you can have two USB button harnesses connected. To configure your second set of USB buttons, click File --> Edit Raw Preferences File from within Photoboof, which will open Photoboof's configuration file, and search for these lines:
com_port2 = none
button1b = default
button2b = default
button3b = default
button4b = default
You'll then set the value for com_port2 to the comport that your button is attached to. You can set it to "auto" if you want Photoboof to try to find your button automatically. After changing this value remember to restart Photoboof.
Here's a list of actions you can assign to each of the buttons:
none (no action set)
start (start with default layout)
color (start in color)
b&w (start in b&w)
sepia (start in sepia)
negative (start in negative)
painting (start in painting mode)
sketch (start in sketch mode)
credits (add one credit)
reprint_last (reprint the last strip)
show_last (show the last strip)
[layout name] (start Photoboof with a specific layout name)
Microphone Jack
One of the easiest ways to build a photobooth button is by connecting a button to your soundcard's microphone jack. Simply connect the two wires that come from the button to an audio jack such as Radio Shack part # 274-274. Then use any 1/8" male-to-male audio cable to connect the button to your soundcard's microphone jack. For a button, ideally you'd use an arcade button, but in a pinch you could even use a doorbell button available at any hardware store. Here's a picture:

You'll then need to set your microphone as the recording device in Windows. There are a number of ways to do this, but I think the simplest is to go to Control Panel --> Sounds --> Audio, and click the "Volume" button under "Sound Recording", which should launch your soundcard's recording mixer. Make sure "microphone" is checked, and that the volume level isn't muted.
You can test your button by opening any sound recording program such as Windows Sound Recorder or, better yet, Audio Level Meter. When you press your button, you should see a spike in the sound levels.
To tell Photoboof to listen for button presses on the microphone jack, go to File --> Show Preferences --> Triggers and check the box that says "mic jack".
Stealth Switch
The "StealthSwitch" is a foot pedal marketed as a way to hide whatever is on your screen at work. It works well as a photobooth start button though, since its very durable. It has the added advantage of being available at many Staples and Office Max stores. Its big disadvantage is that it doesn't illuminate, and is only available in black.
Griffin Powermates
A note about Griffin Powermates: The Griffin Powermate works well as an external (and cheap) button trigger for Photoboof, though they're not nearly as durable as a regular arcade button. There's a special program included with Photoboof that's meant to work with Griffin Powermates, it's in c:\photoboof7\trigger.exe. To use a Powermate with Photoboof, install the software that came with your Griffin Powermate, then open the Griffin utility from either the Windows Control Panel or the System Tray (the area by the clock) and set it so the Powermate runs c:\photoboof7\trigger.exe on both "click" and "long click". You may also need to check the "Global Only" box. Here's a screenshot of the Griffin Powermate utility configured to work with Photoboof:

Also note that there's another program called c:\photoboof7\reprinter.exe that you can use to make pressing the Powermate reprint the last strip.
Eco Button
Photoboof can also be started using an EcoButton. These are usually avaialble on ebay for around $20, and work pretty well for triggering Photoboof, but they're not nearly as solid as an arcade button, and you can only use one at a time so no separate buttons for color and black & white modes. But they're cheap, easy, and work fairly well. To configure your EcoButton go to Preferences --> Triggers and use the EcoButton pulldown menu to set the action for the EcoButton.
Note: if you're using the EcoButton with Photoboof, the Windows keyboard key on your keyboard won't work while Photoboof is running.

Touchscreen
See the touchscreen section, there's lots of options here.
Keyboard Triggers
By default, the F12 key starts the photobooth session, F6 opens the last strip, F7 reprints the last strip, and F8 takes a preview picture. There's some other keyboard shortcuts you can set on the Triggers folder tab of Photoboof's preferences.
Advanced Tip: you can optionally set any keyboard key (letters and numbers) as a trigger. To do so, open the configuration.ini file (File --> Edit Raw Preferences File) and scroll to the end and add lines like this:
keyboard_a = start
That line will make Photoboof start when the "a" key is pressed.
keyboard_b = reprint_last
That line will make Photoboof reprint the last strip when the "b" key is pressed.
Some other available keys: left/right/up/down arrows, home button, end button, and insert button. Here's how to refer to them in the config file:
keyboard_left_arrow = reprint_last
keyboard_right_arrow = reprint_last
keyboard_up_arrow = reprint_last
keyboard_down_arrow = reprint_last
keyboard_home = reprint_last
keyboard_end = reprint_last
keyboard_insert = reprint_last
keyboard_enter = reprint_last
Other available actions:
none (no action set)
start (start with default layout)
color (start in color)
b&w (start in b&w)
sepia (start in sepia)
negative (start in negative)
painting (start in painting mode)
sketch (start in sketch mode)
credits (add one credit)
reprint_last (reprint the last strip)
show_last (show the last strip)
[layout name] (start Photoboof with a specific layout name)
Remember to be careful when editing the configuration file. The most common error is to have two entries for a given variable. For example, setting the value of "keyboard_a" twice. You might want to make a backup of configuration.ini before editing it.
Joystick Buttons
You can use joystick buttons as start buttons. You can even use the different buttons on your joystick to start Photoboof in different modes. For example, one button could start the session in color, one in b&w, one with the double strip layout, etc. See the "Advanced Tip" below for notes on assigning different buttons to different modes.
To enable or disable your joystick, go to Preferences --> Triggers. The joystick option is at the bottom right.
If you're handy with a solder iron, you could easy open up your joystick and solder any button you want to the joystick's buttons, for a more professional look.
Advanced Tip: you can optionally set any of the joystick buttons to start Photoboof in different modes. To do so, open the configuration.ini file (File --> Edit Raw Preferences File) and scroll to the end and add lines like this:
joystick_button1 = b&w
That line will make Photoboof in black & white mode when joystick button 1 is pressed.
joystick_button2 = sepia
That line will make Photoboof start in sepia mode when the joystick button 2 is pressed.
To see the button number, go to Preferences --> Triggers in Photoboof and set the "joystick" pulldown menu to "start". Now when you press the button Photoboof will report the button number in the status area.
Other available actions:
none (no action set)
start (start with default layout)
color (start in color)
b&w (start in b&w)
sepia (start in sepia)
negative (start in negative)
painting (start in painting mode)
sketch (start in sketch mode)
credits (add one credit)
reprint_last (reprint the last strip)
show_last (show the last strip)
[layout name] (start Photoboof with a specific layout name)
Remember to be careful when editing the configuration file. The most common error is to have two entries for a given variable. For example, setting the value of "joystick_button1" twice. You might want to make a backup of configuration.ini before editing it.
Other Triggers
On the Triggers configuration screen (File --> Show Preferences --> Triggers) you can also have Photoboof start on left or right mouse click. Let me know if you need some other trigger.
Remote Triggering
You can trigger Photoboof from other programs, scripts, or even computers by running the program c:\photoboof7\trigger.exe.
Alternatively, you can simply place a text file in c:\photoboof7\utils called go.txt. If the file is blank Photoboof will simply start the photobooth sequence, but if the contents are "b&w" it'll start the sequence in black & white, if its "color" it'll start in color, if it's "reprint_last" it'll reprint the last strip, and if its the name of some layout it'll start Photoboof and produce that layout.
Photoboof watches the folder c:\photoboof7\monitored_folder for pictures, and when enough have been placed in that folder, it processes them using the currently selected layout and printer settings. This can be very useful at events where you might have a roaming camera away from your booth: simply copy the pictures to the monitored pictures folder and Photoboof will process them.
For example, suppose you're using the "double strip" layout, which is a 4 picture layout. Once the 4th picture appears in c:\photoboof\monitored_folder -- either from being copied there from a network share, or from a thumbdrive, or whatever -- Photoboof will process the pictures into double strips and then print them.
Note that it saves the pictures after processing in c:\photoboof7\monitored_folder\archived pictures, and it saves the printed strips in c:\photoboof7\monitored_folder\strips, and it saves the animated GIFs in c:\photoboof7\monitored_folder\gifs.
Advanced Tip: You can use the monitored folder feature to create any layout you'd like, containing any number of pictures. In other words, you can use this feature to create a different layout than the main photobooth sessions. To set a special layout for the monitored folder, open the configuration file (File -> Edit Raw Preferences) and search for "monitored_folder_layout". If you don't see that value in your config file, which would be the case if you're upgrading from an old version, you can simply add it or reset your config file. Then for example, if you wanted to create the layout named "single pic - dslr", you'd make the line look like this:
monitored_folder_layout = single pic - dslr
Be careful to copy the layout name exactly, with spacing and punctuation, though you can ignore case.
To set this back to the primary layout, the line should look like this:
monitored_folder_layout = default
Advanced Tip: If you ever need to reprocess all the pictures from an event, you can simply copy all the pictures to the monitored folder, and Photoboof will process them alphabetically. If you don't want to print them, simply disable printing in File --> Configure Printing.
Advanced Tip: Photoboof can monitor any folder, even a network share. If you want to change the location of the monitored folder, open up the configuration file by clicking File --> Edit Raw Preferences File and search for "monitored_folder". Whatever folder you specify here will be the folder that Photoboof monitors.
As of version 7.53, you can shoot pictures manually with Photoboof, outside of a photobooth session.
To use this feature, you have to first set a trigger (keyboard key, USB button, joystick button, Stealthswith, etc) to "manual release". So go to Preferences, then the Triggers folder tab, and set the action for that trigger to "manual release". For example, if you want to take a manual picture whenever you press the "page up" keyboard key, go to the Triggers folder tab of Preferences and look for "page up", and in the pulldown menu next to it select "manual release".
Now whenever the "page up" key is pressed, Photoboof will take a picture and place it in the monitored folder directory, and process it according to those settings. Read the section on the monitored folder above for some notes on configuring that, but here's a few things to keep in mind:
- by default it will produce the main layout, but you can optionally set this to any layout you'd like.
- when it gets enough pictures to make the layout (for example, if your layout has 4 pictures, it will wait for 4 pictures to be taken), it'll construct the layout and print it.
- it will then store the pictures in c:\photoboof7\monitored_folder\archived pics, and the strips in c:\photoboof7\monitored_folder\strips.
- note that it doesn't currently show the pictures on the screen, but we may be adding that ability shortly. Feel free to email if you have any thoughts on that. In the meantime, a good workaround if you're using a Canon Powershot or DSLR is to go to Big Picture's File menu and select "automatically view last picture on monitor 2" (or whichever monitor you'd like), and in Photoboof click Action -> Duplicate Live Preview to show the camera's live view.
Photoboof has extremely flexible touchscreen support. Users can choose to use the default options; or do a session in b&w, color, sepia or negative color mode; or choose their own layout. Allowing the user to choose from a few layouts means people can choose different foreground images, different backgrounds, different color modes, different number of pictures, choose between a double strip or a 4-up layout, etc. The flexibility is huge.
Configuring Photoboof
If you only want a single region, meaning you simply want users to touch the screen to begin, no configuration is necessary. But if you want multiple regions, each starting Photoboof with different color or layout settings, you'll need to configure things a bit.
To configure Photoboof's touchscreen support, go to File --> Show Preferences --> Touchscreen. The first step is to set the number of regions: this is the number of different areas of your touchscreen that will have different actions. For example, if you want the user to be able to start the sequence in sepia or color, you'd choose "2" from the regions pulldown list, since that's two different options. If you want the user to have the choice of b&w, color or sepia, you'd choose "3" from the regions pulldown list. If you want the user to have the choice of starting the sequence with the double2 layout or 3x1a layout, you'd choose "2" from the regions pulldown list.
The regions are hard-coded into Photoboof, but vary with the number of regions. For example, if you're using two regions, the location of the regions is different than if you're using three regions. You can see where the regions are by clicking the "Show Region Map" button on the Touchscreen Preferences page. For example, if you have three regions, the left third of the screen is Region 1, the center third is Region 2, and the right third is Region 3. Note that the regions are based on a proportion of your touchscreen and not strict pixel dimensions.
After selecting the number of regions, you can assign an action to each region in the "Touchscreen Region Actions" box below the area where you chose the number of regions. For example, if you want to have three different touchscreen regions, and Region1 to start the sequence in color, Region2 to start the sequence in sepia, and Region 3 to start the sequence in b&w, you'd choose "color" from the "Region 1" pulldown, "sepia" from the "Region 2" pulldown, and "b&w" from the "Region 3" pulldown.
After configuring your touchscreen regions, you'll need to make a ready graphic that instructs your users where to touch the screen. See the Skinning Photoboof section of the manual for more notes on this, but the gist is you'll replace the file called ready.jpg in your Skins directory, which by default is c:\photoboof7\assets\default. For example, if you have 3 regions, one for color, one for b&w and one for sepia, your ready graphic might look something like this.
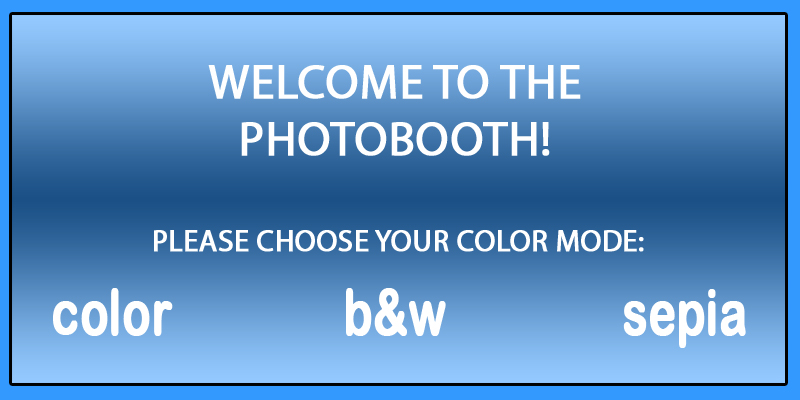
Also note that on the Touchscreen Preferences page you can choose to hide the mouse cursor when its over your touchscreen, which means your users won't see the mouse cursor. This is very nice for polish, but when you're troubleshooting your touchscreen you might not want to have this option enabled.
Advanced Tip: by combining the power of custom layouts with different touchscreen regions, you can create a very dynamic photobooth experience. I know there's a learning curve to the custom layouts, but its worth learning, and you can always email support if you need help.
Configuring Your Touchscreen Hardware
Its important to realize that a touchscreen just emulates a mouse. In other words, if you touch somewhere on your touchscreen, the mouse cursor should appear at that point. If it doesn't, you need to run your touchscreen's calibration utility.
And note that if you're using your touchscreen as a secondary monitor, you'll also need to run the manufacturer's multi monitor configuration utility. There's a few notes on configuring your monitor as a secondary display here.
Letting Users Chooser Color Modes
You can use your touchscreen to let users choose what color mode they'd like to use for their session. To enable this, go to Preferences -> Camera, and for "color mode" select either "color chooser1" (to give users a choice of color, b&w or sepia), "color chooser2" (color or b&w), "color chooser3" (color or sepia) or "color chooser4" (b&w or sepia). Note that it'll use the graphic "color_chooser1.jpg", "color_chooser2.jpg", etc., from your skin folder (by default, that's c:\photoboof7\assets\default) as the graphical asset, so you get full control over the look and feel of this screen. You can download the Photoshop source of those files here if you'd like to customize them.
Note that you can let users choose color modes even without a touchscreen. For example, if you want people to be able to choose between color or black & white using physical buttons, you'll go to Preferences -> Camera and set the "color mode" to "color chooser2" (which makes Photoboof show a screen letting them choose between color or b&w at the start of the session), then you'll go to Preferences -> Triggers and set your first button to "touchscreen-1" and your second button to "touchscreen-2". Now when the user is shown the color chooser screen they can press button 1 to choose color and the second button to choose black & white.
Photoboof uses a Phidget relay board to interface with external lights. By using Photoboof's external commands, you can flash a light in your printer chute to let your customers know their printout is ready, or to turn on a light when your printer is out of paper, or to turn on the button light when enough money has been inserted, or any other lighting need you might have.
Here's a picture of the Phdiget relay board:

As with all relays, this board has a "normally open" (aka "NO") connector, and a common, which is the middle connector on each relay. You'll need a small electronics screwdriver to screw down the tiny screws on the relay connectors.
A nice way to control multiple lights off one relay is to splice one wire of an extension chord, connecting one wire to the NO ("normally open") connector and one wire to the middle connector. In other words, the relay functions as a simple switch. When the relay is engaged, your extension chord (and any lights plugged into it) are turned on. Obviously you should be careful with your wiring so you don't electrocute yourself or others.
Note that the Phidget relay board requires you to install the Phidget driver package. You don't need to leave the Phidget utility running to use the relay board.
Please see the External Commands section of the help file for some hints on controlling lights from within Photoboof. As always, please email support if you need any help, or need any more control added.
The easiest way to use Photoboof with a bill acceptor is to connect the wires on the bill acceptor that send pulses when they receive money to Photoboof's button harness. See this page for more discussion on which bill acceptors work particularly well with Photoboof. See the section Triggering Photoboof for notes on how to wire a bill acceptor directly to Photoboof's button harness.
Let me know if you need a ccTalk interface for your bill acceptor, we have a beta system that works quite well with ccTalk.
Photoboof can also work with any bill or credit card acceptor that directly edits a text file with the number of credits. If that's the case, point it to c:\photoboof7\credits_file.txt.
To put Photoboof into money mode, set the variable money_mode = yes in the configuration.ini file. Note that changing this while Photoboof is running requires restarting Photoboof.
You can add and remove credits (i.e., increase and decrease the number in the credits text file) from Photoboof under the Actions menu. Or just edit the credits file directly.
When money is inserted, The Viewer will load the graphic file at c:\photoboof7\assets\[skin]\viewer_credits[#].jpg. For example, if they've inserted 2 credits and you're using the default skin, it would load c:\photoboof7\assets\default\viewer_credits2.jpg. You can make as many graphics files as you'd like for this. For example, if there are 40 credits inserted, The Viewer will load c:\photoboof7\assets\default\viewer_credits40.jpg.
When the number of credits inserted is at least the number you set in credits_to_start, the customers will be able to start taking pictures by pressing the start button (i.e., whatever you have set as a trigger).
Note that until the correct number of credits have been inserted, the viewer will display c:\photoboof7\assets\[skin]\not_ready.jpg, and after the correct number of credits have been inserted it'll display c:\photoboof7\assets\[skin]\ready.jpg.
You can also have Photoboof start automatically when enough credits are inserted by setting the variable money_mode_start_automatically in configuration.ini to yes.
Notes on Capturing Email Addresses
Photoboof can capture email addresses and other information, and send emails and MMS (text messages) right from your booth as people use it. If your booth is off-line it'll wait and send the emails the next time it finds an internet connection.
To enable data entry, go to Preferences --> Data Entry and check "Enable Data Entry".
To set the data you'll be capturing, choose one of the templates from the "Data Entry Template" pulldown menu.
The "Data Entry Position"determines where the data entry screen is shown. Set it to "1" to show it at the beginning of the sequence, "2" to show it after the intro message, or "3" to show it after the final picture.
The "Validate Emails" value determines whether Photoboof will check for improperly formed email addresses.
The "Allow Bypass" value determines whether or not people will be able to skip the data entry screen. If its set to "yes", a "no thanks" button will appear on the screen, letting people bypass it.
The "Timeout Seconds" is the number of seconds Photoboof will wait before considering the session timed out. Note that the countdown gets reset whenever someone types, so it shouldn't time out on slow typers.
the "Abort on Timeout" value determines whether Photoboof considers the session cancelled if someone times out on the data entry screen. For example, if you're showing the data entry screen at the beginning of the session, you probably want to abort the session if they time out, since it probably means that the customer walked away. But if you're showing the data entry screen after the photobooth session, you probably want to set this to "no" so it produces the layout and prints it.
Note that all the graphical assets for the data entry templates are in your skin folder. For example, if you're using the "data1" data template, the graphical assets are in c:\photoboof7\assets\default\data1.
Also note that all the data from each session is stored in text files in the folder c:\photoboof7\text_files. And you can always produce CSV file of all the data by clicking Action --> Export Data Entry to CSV File.
Twilio Support
Twilio is a paid service that lets you send your pictures directly from the booth to people's cellphones. As of writing this it costs about two cents per text message that you send, but you can check their current rates on their rates page. Note that Twilio is a third party service, we're unaffiliated with them and get no commission per message sent.
To use Twilio you'll need an account with them, here's some notes on getting things set up:
- you set your Twilio account data in Photoboof's Preferences -> Email/MMS screen. From your Twilio account You'll need your "Twilio SID", your "Twilio Auth Token" and your "Twilio Phone Number". To get your Twilio SID and Twilio Auth token, visit your Twilio Settings page and scroll down to where it says "API Credentials", and copy your Twilio SID to Photoboof's Preferences -> Email where it asks for your Twilio SID, and do the same with your Twilio Auth Token.
- next you'll need to enter your Twilio Phone Number. You can obtain a phone number by clicking "Obtain a Phone Number" here, and you can view the phone numbers you've already obtained from Twilio here. You'll only need one, and you enter that in Photoboof's Preferences -> Email where it asks for your Twilio Phone Number.
Note that if you're using a demo Twilio account you'll need to whitelist every phone number you're sending messages to, which you do here.
- then to have people send their photos via Twilio, they enter a phone number on the data entry screen in the email field. Users can enter a mix of phone numbers and email addresses if they'd like, separated by commas. You might want to edit the label on the text field to say "Email or Phone", please email us if you need help doing that.
- also note that if you're sending the video verison of the GIF via Twilio, that Twilio will reject it if its over 700k. That's a big problem with Twilio that we have no control over. Our current workaround is to post a link to the video GIF, but we hope that Twilio changes this policy soon. You can shrink the size of the video gif by editing the "video_gif_duration" in the config file. The default duration is 15 seconds, but a duration of about 5 seconds will keep it under the 700k limit in most cases.
Advanced Tip: normally at the end of a session Photoboof displays the file "msg_finished.jpg" from the skin folder (by default, that's the file c:\photoboof7\assets\default\msg_finished.jpg). The graphic usually says something like "Thanks, your strip will be ready in a moment". However, if you add a file named "msg_finished-email.jpg" to your skin folder, it will be displayed at the end of any session where the user has entered an email address. This lets you tell those people something like "Thanks, your strip will be emailed to you shortly!".
Advanced Tip: by default the on-screen keyboard has shortcut keys for .com, .edu, .net and .org. But these 4 keys can be remapped to any letter or phrase you'd like. To do that, open the configuration file (File -> Edit Raw Preferences) and search for "data_entry_special_key1". If you don't have this value in your config file, you'll need to update your configuration file by clicking File -> Uupdate Configuration File. And note that you'll need to make the graphical asset for the new key you create, which is in the /keys subfolder of your skin folder. Simply replace the graphical asset that's already there, keeping the same filename and image dimensions.
For example, if you're in Germany and want the .edu key to become a .de key, you'd open the config file by clicking File -> Edit Raw Preferences, then search for "data_entry_special_key1". By default the line reads:
data_entry_special_key1 = .edu
You'd change that to:
data_entry_special_key1 = .de
And you'll also want to update the graphical asset for the key so the keyboard says ".de" instead of ".edu", so you'd open the folder with your keys (for example, if you're using the default skin and data template "data1", that would be c:\photoboof7\assets\default\data1\keys) and replace "edu.png" and "edu_pressed.png".
Note that you can also map these keys to send a space by setting its value to "space" or to submit the data by setting its value to "submit". So for example, if you wanted to map the .com key to send a space instead, you'd open the config file and search for "data_entry_special_key4" and set the value to "space", so the line would look like:
data_entry_special_key4 = space
Emailing Pictures From the Booth
If you want Photoboof to email the pictures to people who enter their email addresses, go to Preferences -> Email and click "Enable Picture Emailing". Photoboof's Emailer window will then appear, and will process any sessions that need to be emailed, and will watch for new sessions to email.
On Preferences -> Email you'll also want to put your name, your email, the email subject, and the email body of the email that will be sent to people.
You can also use a separate layout for emailing pictures by modifying the value of "email layout" on this screen. In other words, you can have one layout that gets printed in your booth, and another used for emailing.
And whatever layout you use, you can have the emailer shrink it before emailing it, by checking the box labelled "resize for emailing" and setting the number of pixels wide. Note that you shouldn't increase the size of your strip, this is only used for shrinking it.
And note that if you check the "Enable HTML encoding" checkbox at the top of the window, your text will be processed as HTML. See the third "Advanced Tip" below for instructions on inserting the pictures inline (meaning placed at a specific location in your email, as opposed to as attachments).
Advanced Tip #1: when data entry is enabled (in other words, you went to Preferences -> Data and turned on data entry, so people can enter their emails during the session), Photoboof produces a unique photo code for each session, and places the coded version of the layout in c:\photoboof7\strips-coded. For example, if the code is "r5iu4", Photoboof will produce a version of the strip called c:\photoboof7\strips-coded\r5iu4.jpg. This can be useful for uploading the strips to a web server and having users enter their photo codes. And using the Layout Editor, you can put the text "{code}" where you want this text to be printed.
Advanced Tip #2: when emaling pictures is enabled, Photoboof places a copy of the text file containing information about the session in the folder c:\photoboof7\uploader_queue. After uploading, it moves them to c:\photoboof7\text_files. You can always place text files in the uploader_queue folder to re-email them, or delete files from that folder if you don't want them emailed.
Advanced Tip #3: if you'd like the pictures sent inline in your email, as opposed to as attachments, follow these instructions. This gives you tremendous control over the formatting and look of the email, but does require a little knowledge of HTML.
- in Preferences -> Email, check the box labelled "Enable HTML encoding".
- put your message, with HTML tags, in the "Email Body" field. For example, a simple message (without inline images) might be:
<p>Great session! Attached are your pics.
<p>See you next time!
Here's an example that places the strip inline, at a specific location:
<p>Great session! Here's your strip:
<p><img src=%strip% width="300">
<p>See you next time!
Note the "%strip%" wildcard, which is replaced with your strip. Put that wherever you want the strip to appear in your email. For pics, the wildcards are "%pic1%", "%pic2%", "%pic3%", etc. For the GIF, the wildcard is "%gif%". So here's an example that inserts two pictures, a strip and a gif, setting the size for each:
<p>Great session! Here's your first picture:
<p><img src="%pic1%" width="300">
<p>Here's your second picture:
<p><img src="%pic2%" width="300">
<p>Here's your strip:
<p><img src="%strip%" width="400">
<p>And here's your GIF:
<p><img src="%gif%" width="300">
<p>See you next time!
And of course, if you'd like to include the GIF in the email, make sure to tell Photoboof to email the GIF. In other words, go to Preferences -> Email and check the box labelled "send animated gif". Do the same for pics and strips.
Photoboof can execute commands, controlling lights, sending emails or text messages, uploading or deleting images, etc. This is useful for sending yourself a text message when the printer goes down, or flashing a light when the printout is ready, or any number of creative uses. This is of course optional so don't let this section scare you.
Here are the different times when you can execute custom commands:
- When Photoboof launches
- At the beginning of the photobooth sequence
- After taking each picture
- After taking the last picture
- After making the strip or grid, etc.
- After sending the strip to print
- At the end of the sequence
- If the printer is down (paper jam, out of ink, etc.)
- When no camera detected
- When the camera fails to reply multiple times
To edit the commands, go to File --> Show Preferences --> Commands. For example, if you want to run c:\something.bat whenever Photoboof launches, you'd put the following next to "At Photoboof Launch":
c:\something.bat
There are several special commands for special functions. One such command is "email". If you open c:\photoboof7\configuration.ini and search for "email" you'll find the email parameters, where you can set your SMTP server, recipient email address and password. You can use this to send yourself text messages when the printer is down. From the "commands" preferences tab, you'd write the following next to "Printer down":
Note that most cellphone companies let you send text messages through email, you just need to find out what the format is for that provider. Here's a list of some of them. If it doesn't work, verify the address with your provider:
Alltel @message.alltel.com
Cingular @mobile.mycingular.com
Nextel @messaging.nextel.com
Sprint @messaging.sprintpcs.com
SunCom @tms.suncom.com
T-mobile @tmomail.net
VoiceStream @voicestream.net
Verizon @vtext.com
AT&T - cellnumber@txt.att.net
Verizon - cellnumber@vtext.com
T-Mobile - cellnumber@tmomail.net
Sprint PCS - cellnumber@messaging.sprintpcs.com
Virgin Mobile - cellnumber@vmobl.com
US Cellular - cellnumber@email.uscc.net
Nextel - cellnumber@messaging.nextel.com
Boost - cellnumber@myboostmobile.com
Alltel - cellnumber@message.alltel.com
For example to send a text message to someone on AT&T who's phone number is 415-555-1212, you'd send an email to 4155551212@txt.att.net.
You can also use the Commands preferences tab to control external lights. See the "controlling lights" section above for more info on the Phidget relay board, but the syntax to control relays looks like this. For example, to turn relay 1 on:
phidget 1 on
This is probably pretty obvious, but to turn relay 1 off:
phidget 1 off
You can run multiple commands for a given event by separating each command with a | character (aka, a "pipe") . Not that this isn't an "L", its the tall vertical line found on most keyboards above the \ character.
For example, this would both send an email and run c:\test.bat:
email | c:\test.bat
There are times when you need to insert a delay between two commands, which you do as follows. For example, this would insert a 2.5 second delay between emailing and running test.bat:
email | delay 2.5 | c:\test.bat
Delays can be very useful when, for example, you want to flash the light in your printer chute when the printout is ready. Obviously you'd need to adjust the delays for your particular setup, but here's a sample command. Note that this starts flashing relay 1 (a light) on and off 6 seconds after sending the job to print. If your printer takes longer than 6 seconds print, you'd increase the delay. Add this next to "After sent to printer" on the Commands preferences tab:
delay 6 | phidget 1 on | delay .2 | phidget 1 off | delay .2 | phidget 1 on | delay .2 | phidget 1 off
See the "controlling lights" section above for more notes on making a light flash when your printout is ready.
For testing, you can also use the command "trace whatever message", and it will simply output the text "whatever message" in the Photoboof status window when that command is executed.
Advanced Tip: there are a few external commands that are only accessible by editing the configuration.ini file directly, or by clicking File -> Import Settings. These commands are:
command_money_mode (when in money mode, executed when enough credits have been inserted)
command_after_camera_launch (after the camera has been successfully initialized)
command_after_monitored_folder (after a monitored folder request)
command_after_reprint (after sending a strip to be reprinted)
command_after_picture1 (after picture 1 has been taken). Change this to "command_after_picture2" for a command executed after picture is taken, etc.
For example, if you wanted to turn on a light when sufficient credits have been inserted, you could click File -> Import Settings and paste in the following:
command_money_mode = phidget 1 on
command_money_mode_enabled = yes
There are some Photoboof configurations that can only be made through the configuration file. Don't worry! Its easy to do. And this is of course optional, all critical configurations can be made simply by clicking File --> Show Preferences. And note that as of version 7.5, all these configurations can be made simply by clicking File -> Import Settings and pasting any setting into the text field (see here).
Note that its a good idea to update your configuration file before editing it by clicking File -> Update Raw Preferences File. This will add all the new comments and organize all the settings.
And if you want to explore the raw preferences file, here's a step by step:
1) if you installed Photoboof to the default location, your config file will be at c:\photoboof7\configuration.ini. Its always a good idea to back it up before editing it.
2) open it either by clicking it or, in Photoboof, selecting File --> Edit Raw Configuration File. It should open in Notepad.
3) Any line starting with a number symbol (#) is a comment, and is just there to help you along. Read the comments, the file has lots of them, they're there to help you along.
4) For example here's the first setting in the configuration file:
### The delay in seconds before the first picture is taken after the
### start button is pressed. During this time the intro message
### will be visible:
initial_delay = 6
As you can see, the three lines that start with number symbols are just comments. And reading them you can see that the variable ("initial_delay") is the duration in seconds that the intro message is visible. In the above example its set to 6 seconds. If I wanted to make that 3 seconds, I'd change the line to read:
initial_delay = 3
See, easy! There's lots of settings available in the config file, but here are the most useful ones that can't be edited through the graphical Preferences interface.
Useful Settings in the Configuration File:
initial_delay - the duration in seconds of the intro message before the first picture is taken.
ending_delay - a delay in seconds added at the end of the photobooth session. Useful for slowing things down.
viewer_monitor - which monitor should the Viewer appear on?
ready_pos_x and ready_pos_y - the screen position of the "ready for the next customer" graphic.
cheese_pos_x and cheese_pos_y - the screen position of the countdown graphics before each picture is taken.
viewer_margin - if the Viewer's monitor is partially obstructed by a frame, you can use this to create a margin around the edges of your monitor.
starting_msg_pos_x and starting_msg_pos_y - the screen position of the graphic shown before the first picture is taken when not using Live Preview.
ending_msg_pos_x and ending_msg_pos_y - the screen position of the graphic shown at the end of the photobooth session.
delay_before_ending_message - a delay after the last picture is shown but before the ending message.
blank_on_ready - if set to "yes", the previous user's pictures won't be visible to the next photobooth customer.
hide_cursor - if set to "yes" the mouse cursor will be hidden when its over the Viewer. Very useful if using a touchscreen so the users don't see a lingering mouse cursor.
always_on_top - if set to "yes", the Viewer will be an "always on top" window.
To import Photoboof configurations, click File -> Import Settings. You can then either paste in specific Photoboof settings, or import a file containing any group of settings (including complete configuration.ini files).
For example, suppose you wanted to change the layout on one of your booths to "fancy 4up grid", and you wanted to change the skin to "fancy". You could click File -> Import Settings and paste in the following:
layout = fancy 4up grid
skin = fancy
Alternatively, if you wanted to import those as a file, you'd create a text file containing that data and save it as something like "new settings.ini". The filename doesn't matter. You'd then click File -> Import Settings and browse to that file. And note that you can import an entire Photoboof configuration by sending someone your configuration.ini file (which is in the Photoboof directory) and having them import it.
And note that you can see the names of all the variables, as well as notes on what they do, in Photoboof's configuration file. So click File -> Edit Raw Preferences, or just open c:\photoboof7\configuration.ini.
Photoboof can be completely rebranded for OEMs. In other words, if you're selling completed photobooths, or you don't want your employees to know the name of this program, you can name the program whatever you want.
1) place a file named name.txt in the photoboof directory (c:\photoboof7) with the name of the program. For example, if you want it to be "Cheesy Booths", that would be the only text in the file. No returns, no extra white space. You can simply create this file in Notepad and save it as name.txt.
2) place a file named support.txt in the photoboof directory with the email for tech support. You can omit that if you want to use support@photoboof.com. If you want your own email address to appear for tech support within the program, this might be support@cheesybooths.com.
3) rename photoboof.exe to whatever you want, but no spaces in the name. So it could be CheesyBooths.exe
4) rename photoboof.rsrc.py to the same thing, but preserve the .rsrc.py. ***It must be exactly the same as the executable above***. So in the example, it would be CheesyBooths.rsrc.py.
5) You can rename c:\photoboof7 if you want, but no spaces anywhere in
the path. So it could be c:\CheesyBooths.
Note that the files name.txt and support.txt can be hidden files and Photoboof will still find them.
You can add watermarks to your pictures, which is nice for branding your pictures for social media or for your client. And Photoboof saves the original unbranded versions too, so you can change the watermark later if you'd like.
To add watermarks to pictures, you'll need to edit the config file. So click File -> Edit Raw Preferences and search for the the values below (if you dohn't see them, you can update your config file by clicking File -> Update Raw Preferences and then open the config file again):
add_watermark = no
watermark_filename = watermark.png
### Where do you want to place the watermark? Options are "top left", "top center", "top right", "bottom left",
###
"bottom center" or "bottom right"
watermark_position = bottom right
### This lets you fine tune the position of the watermark
watermark_offset_x = 0
watermark_offset_y = 0
To enable watermarking of your pictures, set "add_watermark" to "yes" above.
And note that your watermark should be a transparent png file named watermark.png. Remember, a good way to create transparent PNG files is to export your watermark from Photoshop by clicking File -> Save For Web, then for filetype choose "PNG-24" and check the box that says "transparency". We've included watermark.png in the Photoboof directory as a sample, but you can of course swap that out.
A few other notes on watermarking:
- Photoboof saves the watermarked pictures separately from the main pictures, in the /pics-watermarked folder, so you still have the original versions. That can be handy if, for example, you ever want to apply a different watermark.
- you can fine tune the placement of the watermark with the watermark_offset_x (for left/right adjustments) and watermark_offset_y (for up/down adjustments) above. And of course those can be negative numbers. For example, to move your watermark 10 pixels to the left, you would set watermark_offset_x = -10.
- if you're uploading to Facebook, a website via FTP and/or using the iPad app, Photoboof will use the watermarked pictures if they exist.
- if you're using the "copy_pics" feature, where Photoboof places copies of the pictures on a thumbdrive or on some other location on your computer or network, Photoboof will use the watermarked versions if they exist.
- your strip layouts don't use the watermarked pictures, since you can apply watermarks in the Layout Editor.
- Advanced Tip: if you want to keep the watermark in your skin folder, delete c:\photoboof7\watermark.png and put the file in your skin folder. Now when you change skins it'll change the watermark with it.
Here's a few notes that don't really fit in any other category.
- if you want to see how many sessions your photobooth has ever had, open the file C:\photoboof7\utils\misc\counter.txt. If you want to reset the counter, simply delete the file.
- if you want Photoboof to start automatically when your computer starts, you can place a shortcut to c:\photoboof7\utils\Delayed Launch.exe in your Startup folder, instead of a shortcut to Photoboof itself. This will launch Photoboof after a 90 second delay to give Windows time to finish loading. To create the shortcut, right click the file and choose "copy", then, in Windows XP and 2000, navigate to C:\Documents and Settings\All Users\Start Menu\Programs\Startup (in Vista, navigate to C:\ProgramData\Microsoft\Windows\Start Menu) and right-click and choose "paste shortcut".
- If you want to do some load testing, click Test --> Load Testing from within Photoboof. That will repeat the photobooth session over and over again. Very useful for testing your equipment. Obviously you might consider disabling printing while load testing...
- If you want to automatically copy the pictures or strips to some other location (a thumbdrive for the client? a 3rd party slideshow app?), open configuration.ini and search for "copy_pics" (to copy the pics) or "copy_strips" (to copy the strips). Set the value to wherever you want the pics or strips to be copied.
For example, if you want to automatically copy all the strips to a thumbdrive that shows up in Windows as the E drive, you'd open up configuration.ini and search for the line that begins with "copy_strips" and change its value to the path to your thumbdrive. In our example where the thumbdrive is the E drive, the line might look like this:
copy_strips = e:\strips
Photoboof would now copy every strip to the "strips" folder on your thumbdrive right after each strip is created.
If you want to automatically copy all the strips and pictures to a folder on your desktop, the values for copy_strips and copy_pics would look something like this:
copy_strips = C:\Documents and Settings\All Users\Desktop\events\strips
copy_pics = C:\Documents and Settings\All Users\Desktop\events\pics
If you'd like, you can copy to multiple locations by separating the locations with commas. For example, to copy every strip to d:\strips and e:\strips2, the line would look like this:
copy_strips = d:\strips, e:\strips
And if you'd like to shrink them before copying them (to make them easier to upload, for example) you can use copy_pics_size and copy_strips_size. For example, if you want to resize the pics so their longest edge is 600 pixels (in other words, if they're horizontal pics, 600 pixels wide), you'd set the value of copy_pics to "600". If you don't want to resize them, just set it to "full". - You can make a secondary layout, meaning a second layout in addition to whatever layout you have selected in Preferences --> Layouts. For now you have to edit the configuration.ini file. So in Photoboof, click File --> Edit Raw Configuration File, which will open configuration.ini, and search for this line:
secondary_layout = none
Change that to whatever layout name you want. For example, if you wanted to create the strip2 layout, the line would read:
secondary_layout = strip2
Note that you can also set where Photoboof saves the secondary layout by editing the value of secondary_layout_location. This is nice if you're using third party sharing software or a slideshow app.
And you can do the same for a third layout by editing the value of third_layout and third_layout_location in the config file.
- Photoboof can organize your pictures by event date if you'd like. Open up configuration.ini and search for the value named "store_pics_by_date" and set that to "yes". So the line would read:
store_pics_by_date = yes
Now for example if the date is July 26, 2011, Photoboof will place all pics in c:\photoboof7\events\pics\2011-07-26 and all the strips in c:\photoboof7\events\pics\2011-07-26. One nice feature is that it doesn't roll over to the next day until 5am, so when your events go late they'll still appear in the same dated folder. - You can change the way the picture review looks by using Photoboof's "picture frame" feature. Open configuration.ini (click File -> Edit Raw Preferences) and search for "picture_frame" and you'll see the variables with commentary. In a nutshell, you place a file named picture_frame.png in your skin folder (by default that's c:\photoboof7\assets\default) and each picture will be placed over it after its taken, so the people in the booth see the picture with whatever branding you'd like. In the configuration file you can set this to be a foreground image (a mask) or a background image.
- If you'd like to have a background image shown in the Viewer's margins, you can modify c:\photoboof7\background_image.jpg. This is pretty experimental and isn't really intended to add branding (you should use the skin and layout files for that), but I thought I'd mention it in case someone finds it useful. It can be any size, and will tile.
- If you don't want to show a countdown before each picture is taken, set the value of picture_delay_before to 0. You can do this in Preferences -> Camera by setting the value of "Delay Before Picture Is Taken" to 0.
- If you want to let your users decide how many prints they'd like, go to File -> Configure Printing, and set the number of prints to "Ask How Many (0-3)" or "Ask How Many (1-4)". Or if you'd like to ask users if they'd like a print (showing only yes or no as options), set that to "Ask Yes or No". At the end of the session the customer will now be asked either how many prints they'd like or whether they'd like a printout. Note that you can customize the look of this screen by replacing the graphic "print_chooser.jpg" if asking how many prints or print_chooser2.jpg if asking whether they'd like 0-3 copies or print_chooser3.jpg if asking whether they'd like 1-4 copies. These graphics are in your skin folder (by default, that's c:\photoboof7\assets\default).
- If you're using a touchscreen, touching the top left corner of the Viewer window will cancel the session. Note that this feature is disabled if your booth is in money mode so people paying for a session don't accidentally cancel their session.
- Remember the golden rule of computers: reboot!
- Sometimes dust gets in the USB connections. Blow out the dust both from your USB cable and from the USB jacks on your computer and camera.
- Never use a USB hub with your camera. USB hubs are fine for your keyboard, arcade button and printer, but connect the camera directly to the computer.
- Make sure you're not out of disk space.
- When your camera's batteries get low the Live Preview stops working.
- If you're having dual monitor issues, see the Dual Monitor section above.
- If you're using a Mitsubishi dye sublimation printer and getting blank pages after every print, go to Windows Control Panel --> Printers ---> right click your Mitsubishi printer and choose Properties, then Advanced, and choose "print directly to this printer".
- You can always email support@photoboof.com. Please let us know what camera you're using, what version of Windows, what camera controller, and if possible send over your log file (c:\photoboof7\log.txt). And if you need to schedule a support call, no problem
[END OF HELP FILE]